This activity is based around the scroll:bit's grid numbers. If you haven't done activity 2, you might want to go back and have a look at it first!

In this activity you'll learn how to use the built-in tilt sensor on the microbit to make an icon slide across the screen (and not fall off)!
You will need:
A micro:bit, scroll:bit, USB cable to transfer code, code editor (e.g. laptop with makecode.com)
How to do it:
1. Break the code down into steps. What will happen when it starts, what will happen when you tilt left, and what will happen when you tilt right?
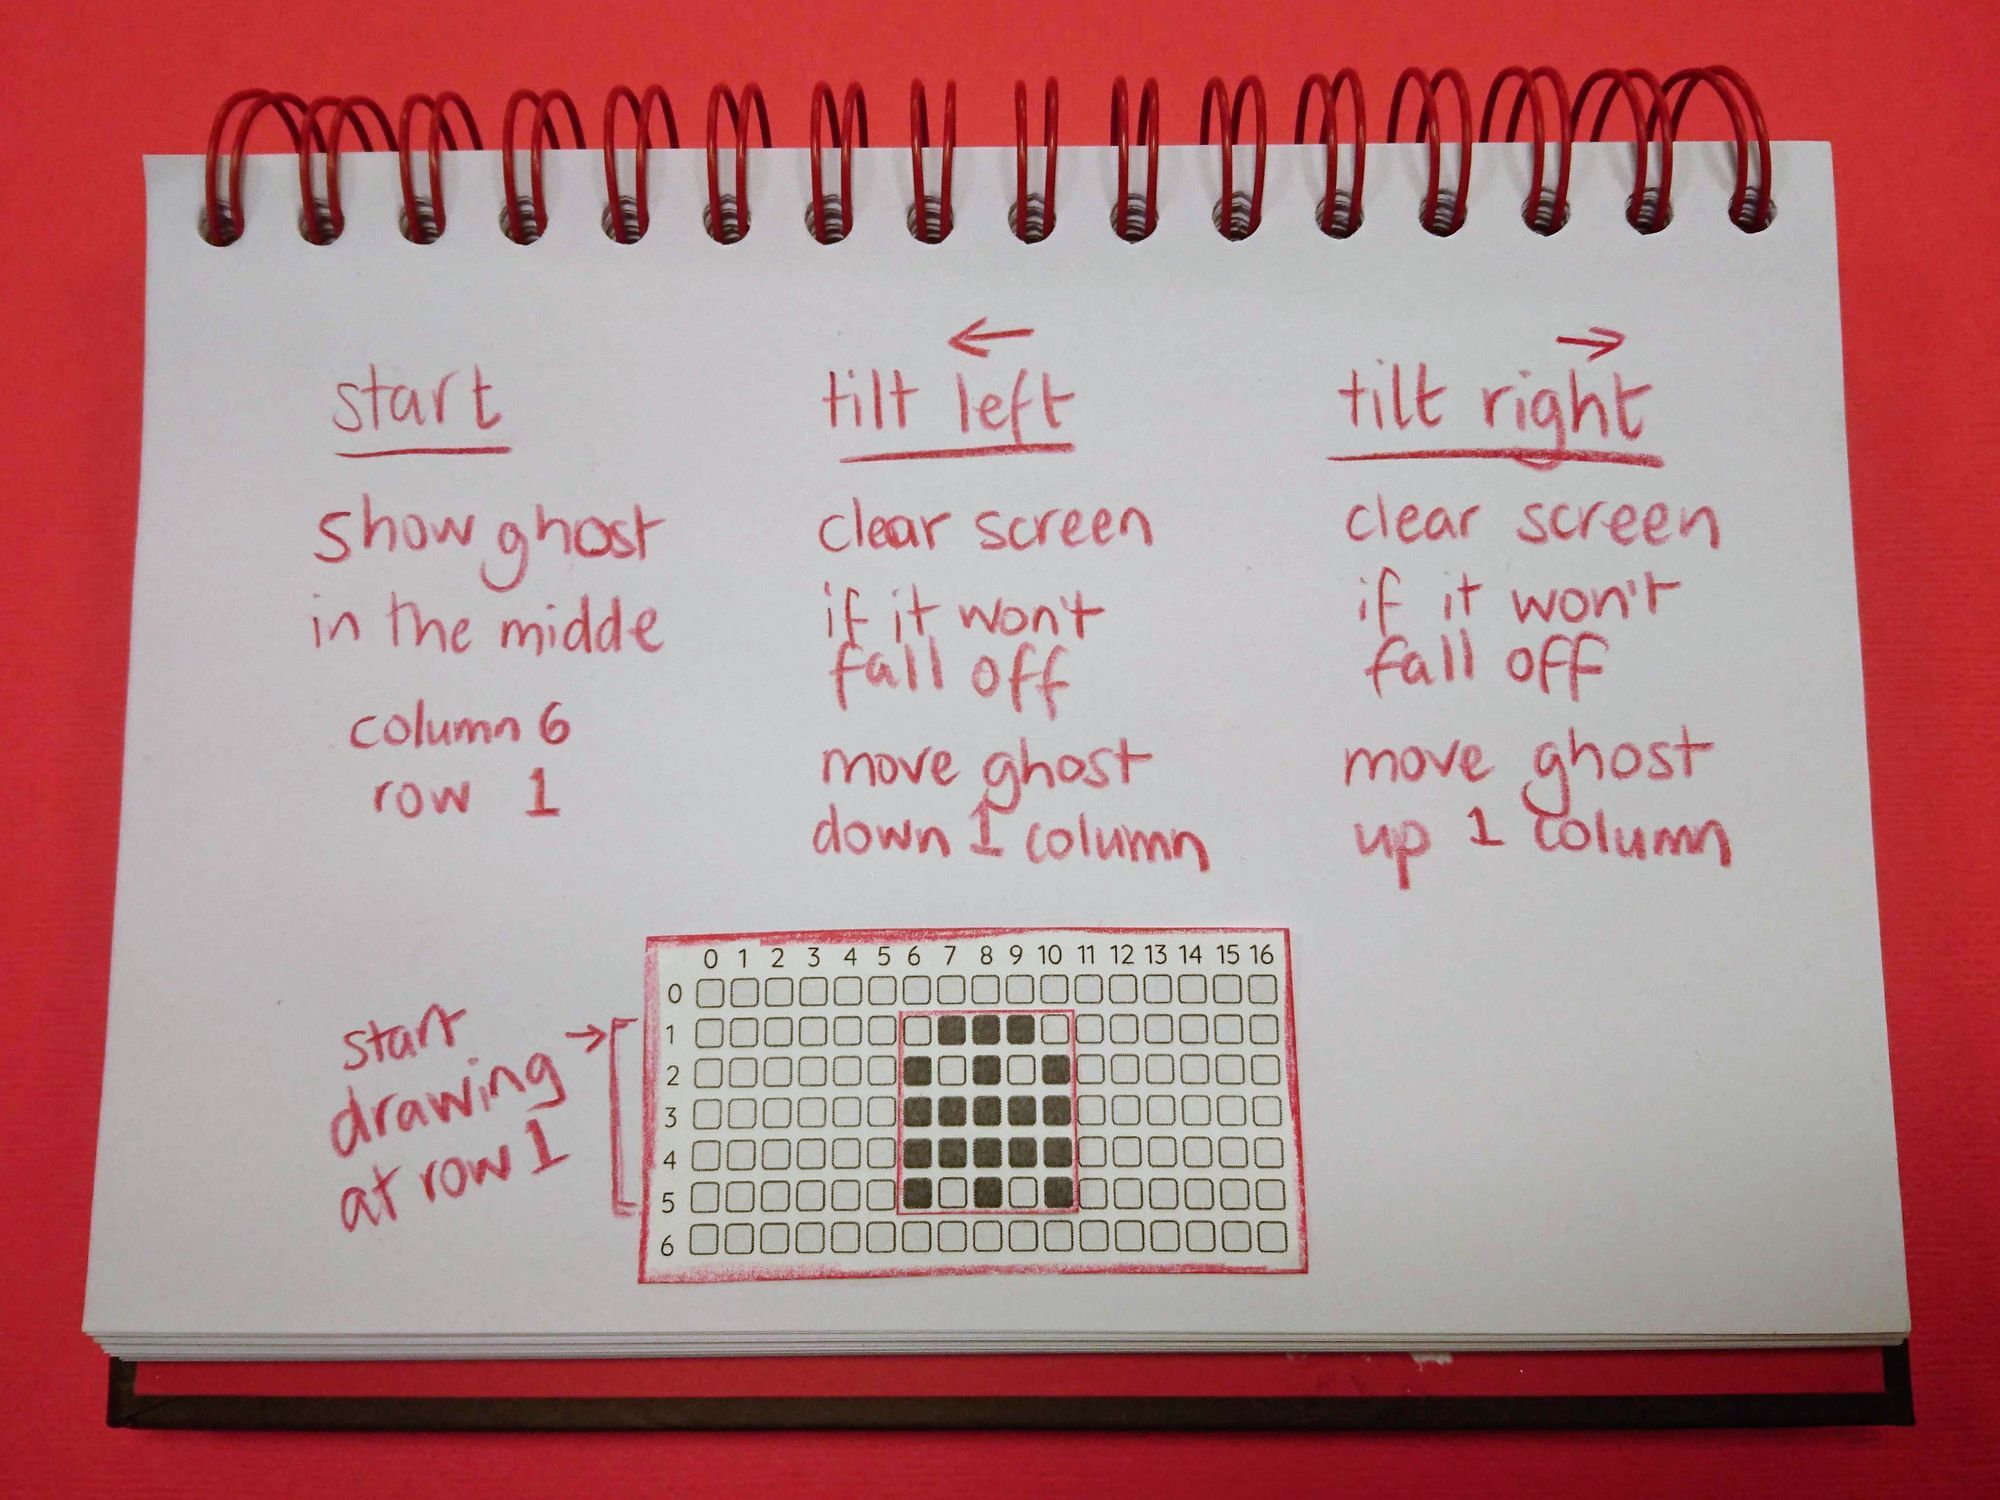
You can find the printable grids here.
Start coding. Go to makecode.com and start a new project. If you haven't already installed the blocks for the scroll:bit there are some instructions here.
2. The "Start" section. We need to do three sections, as in the plan above. Remember that if we are drawing on the scroll:bit grid and not scrolling text, we need to remember to tell it to update after each change!
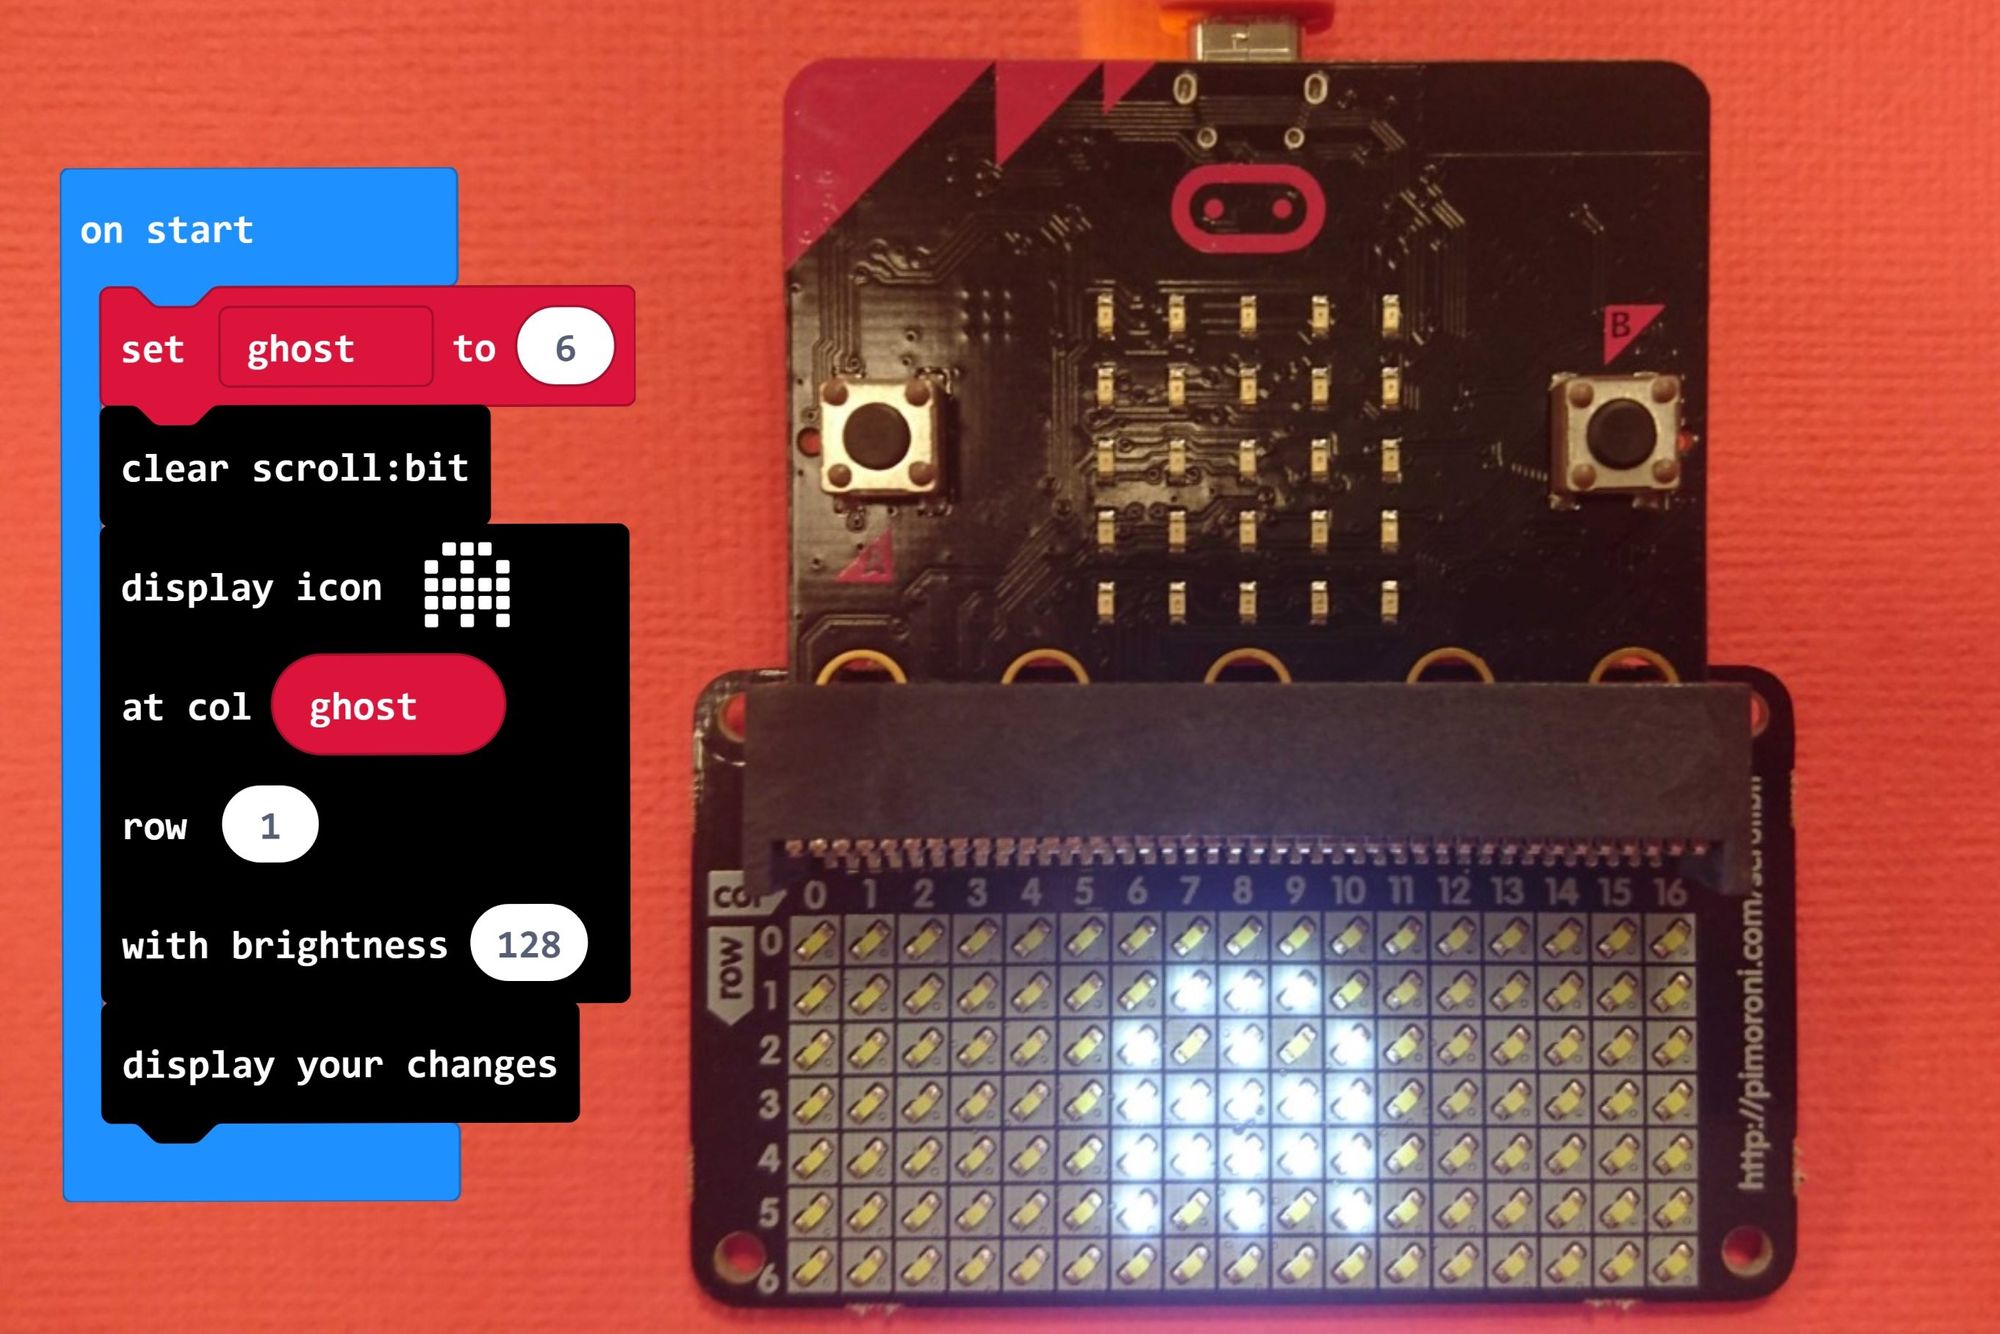
We could just have left out the red variables, and instead asked it to start at column 6. However, that wouldn't give the next part of the code anything to work with, because when we tilt it we need a number to take away from or add to.
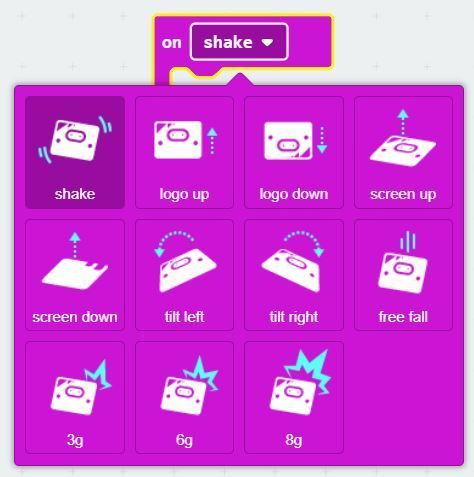
3. The "Tilt Left" section. The tilt commands are a bit hard to find. Go into the Input menu and look for on shake. If you drag that block across to your code and click on it, you'll see you can choose all sorts of motions.
Select tilt left and then we can start putting the code in. We know that if the ghost is all the way over on the left, it's starting in column 0. Therefore, we can let the code make the column smaller, as long as it's bigger than 0, without the ghost falling off the screen.
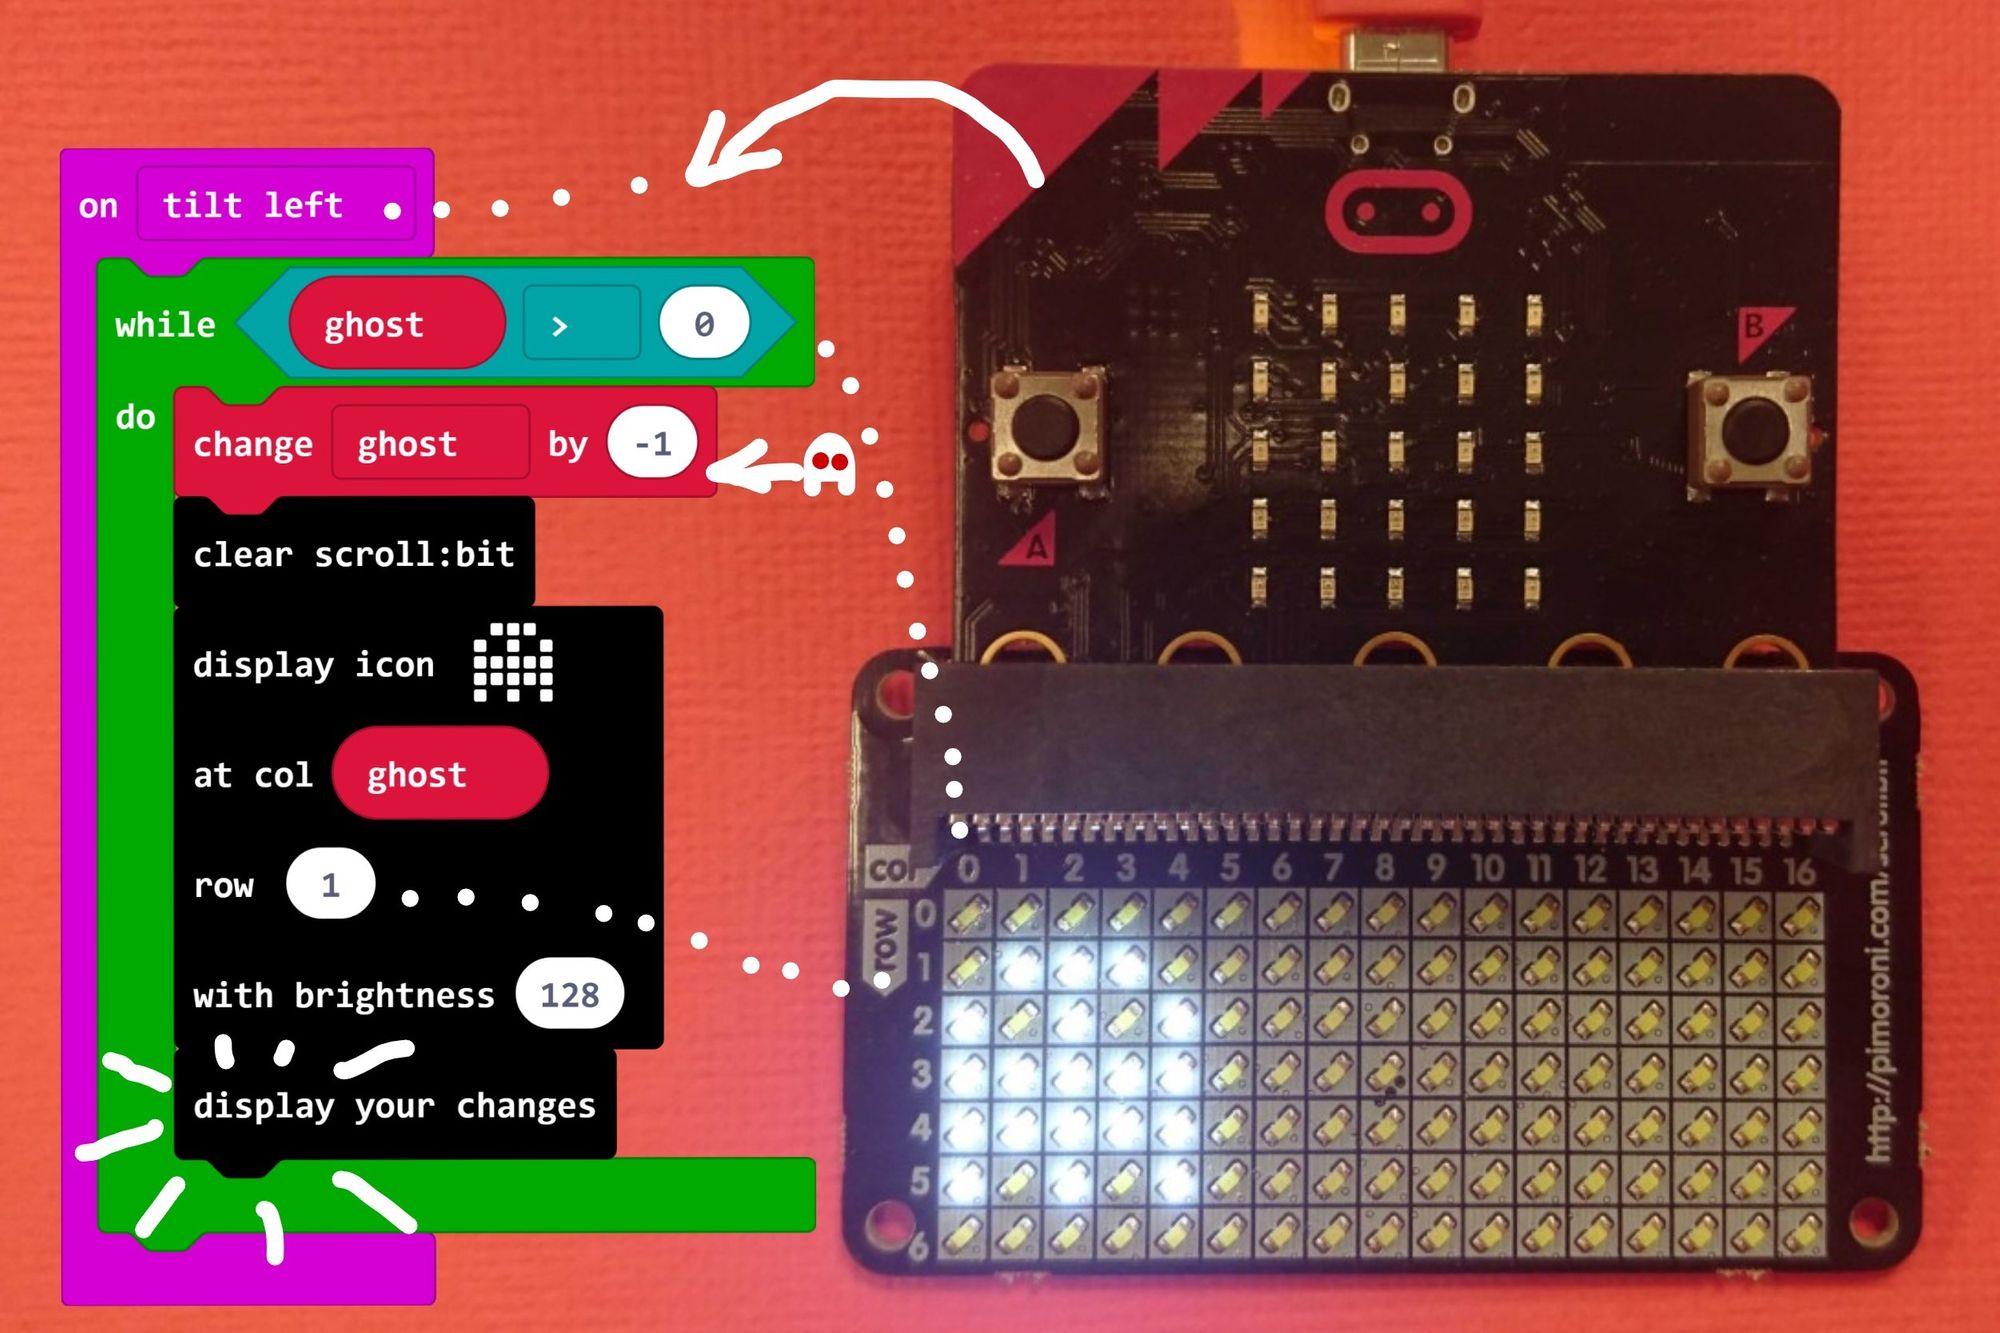
You'll find the green blocks in Loops and the turquoise blocks in Logic.
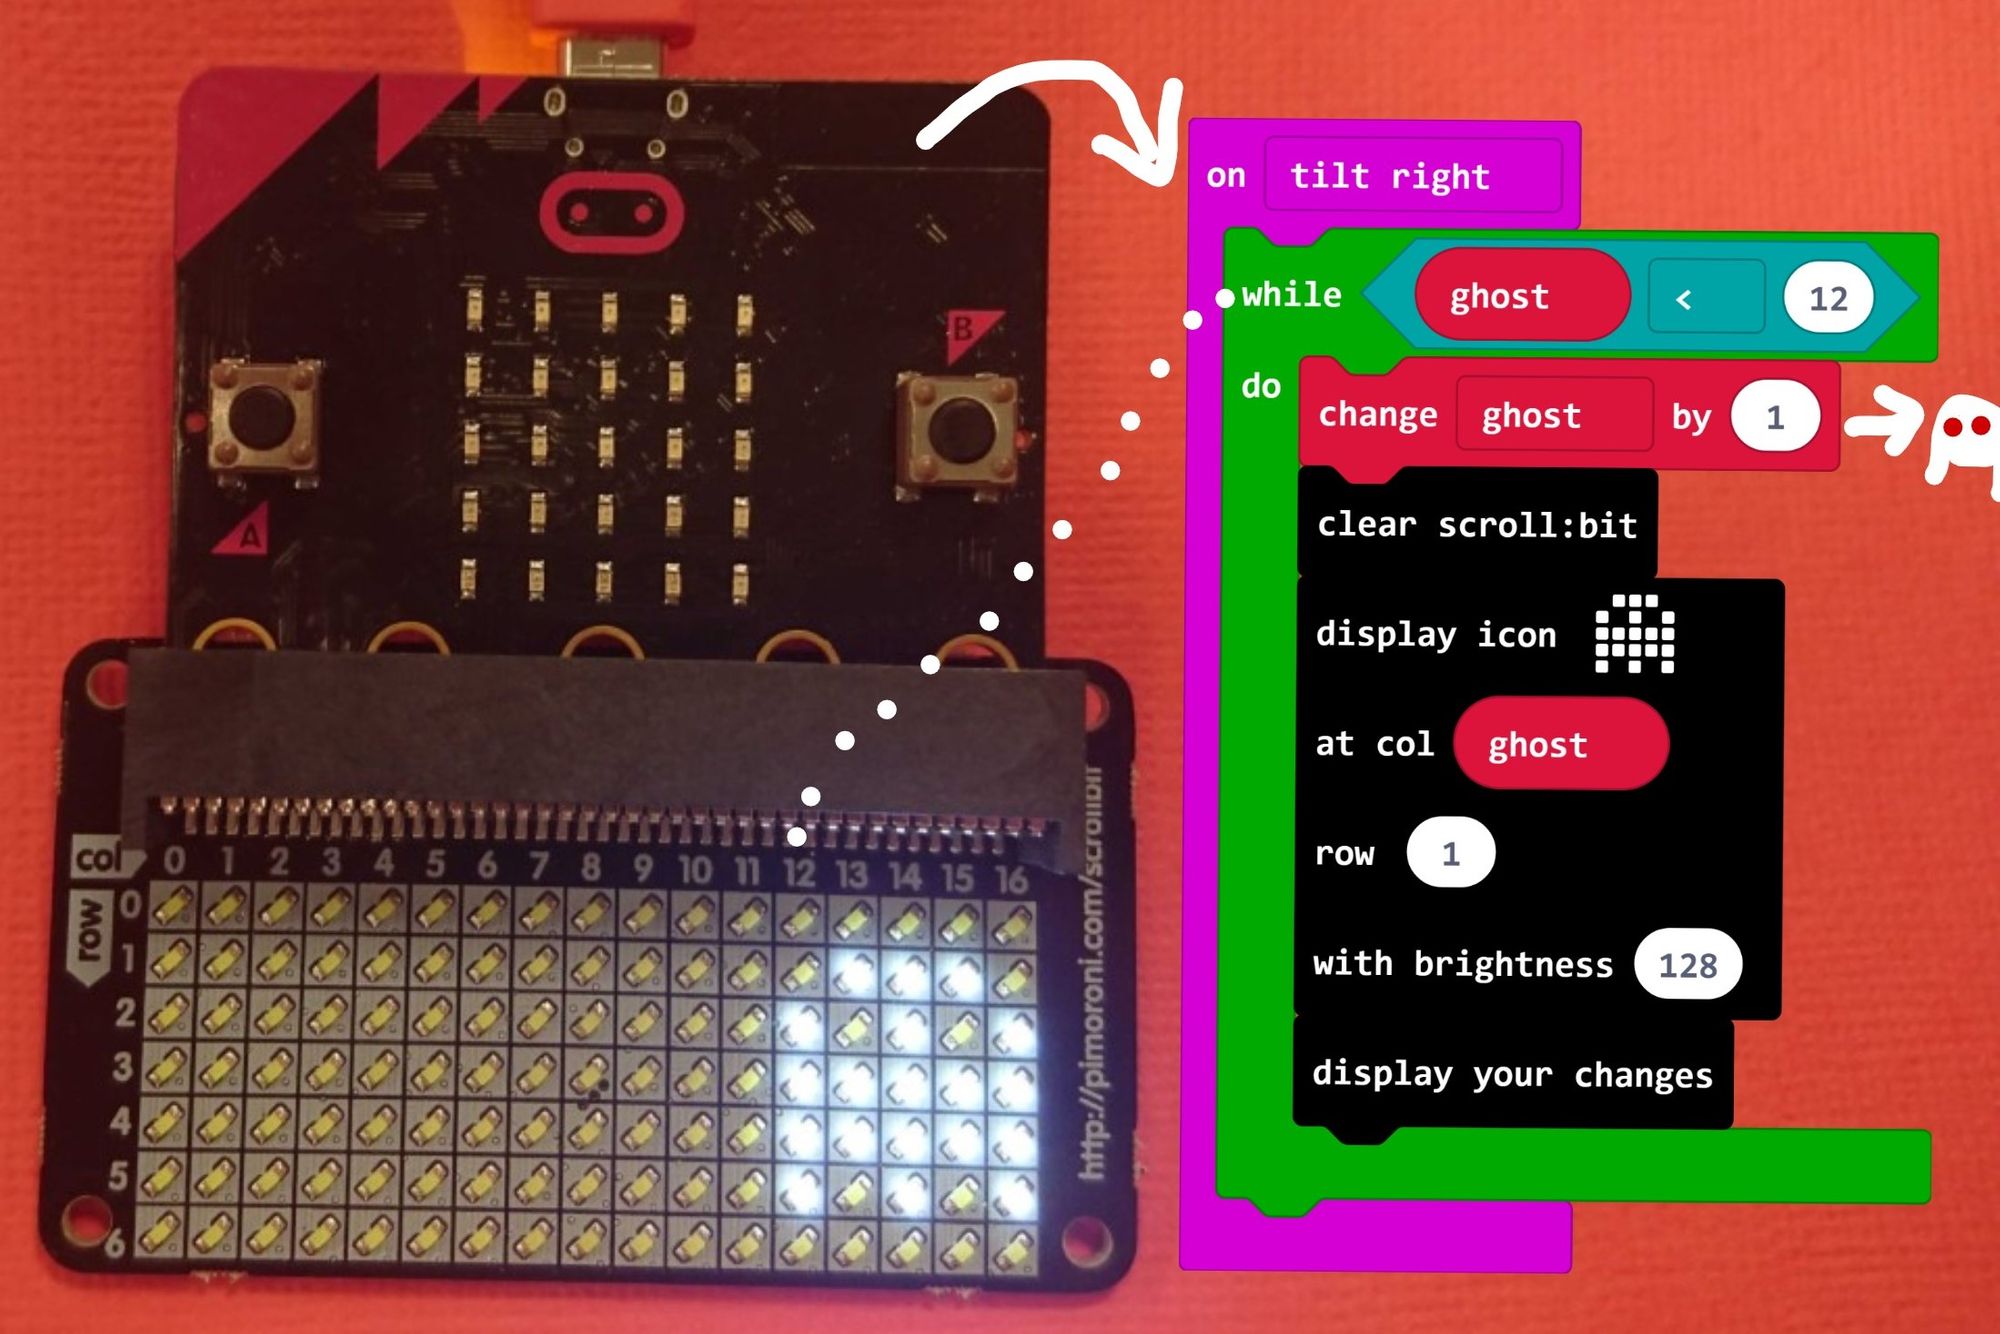
4. The "Tilt Right" section. This section is almost the same as the tilt left section, and if you right-click on the pink block you should be able to duplicate the whole section and just alter some pieces. We need to change "tilt left" to "tilt right", and then in the turquoise logic block, we need to figure out when the ghost will fall off.

When the ghost is on the right edge, the start of the icon (the top left) is in column 12. We now know that we can keep increasing the column number until we get to there, which means we can keep increasing as long as the column number is less than 12.
5. Putting all three sections together. Now you have all three sections, you can download the code to your micro:bit and try it out!
Download the code
Challenges
Why do you have to clear the screen before displaying the ghost? What happens if you don't clear it?
Can you make the ghost stop part of the way along by modifying the code?
Does it have to be a ghost? Try your own choice of icon.
Have a look at the "set pixel" block in the scroll:bit code. Could you use that to draw on the screen?