Displaying an icon on the scroll:bit is just as simple as displaying one on the micro:bit LED screen, but with the size of the scroll:bit you can move it around anywhere you like.
You will learn: how the scroll:bit's grid works, and how to display an icon where you want on the grid of LEDs.
You will need: scroll:bit, micro:bit, USB lead to transfer code, programming device (e.g. laptop)
How to do it: First, we need to take a look at the scroll:bit grid. (There are printable versions here.) You will see that it has columns and rows marked across it. To remember which is which, think about fancy buildings which have columns holding up the roof. Columns are straight up and down, and the columns of LEDs go straight up and down the scroll:bit. Rows of seats go across the room, and rows of LEDs go across the scroll:bit.
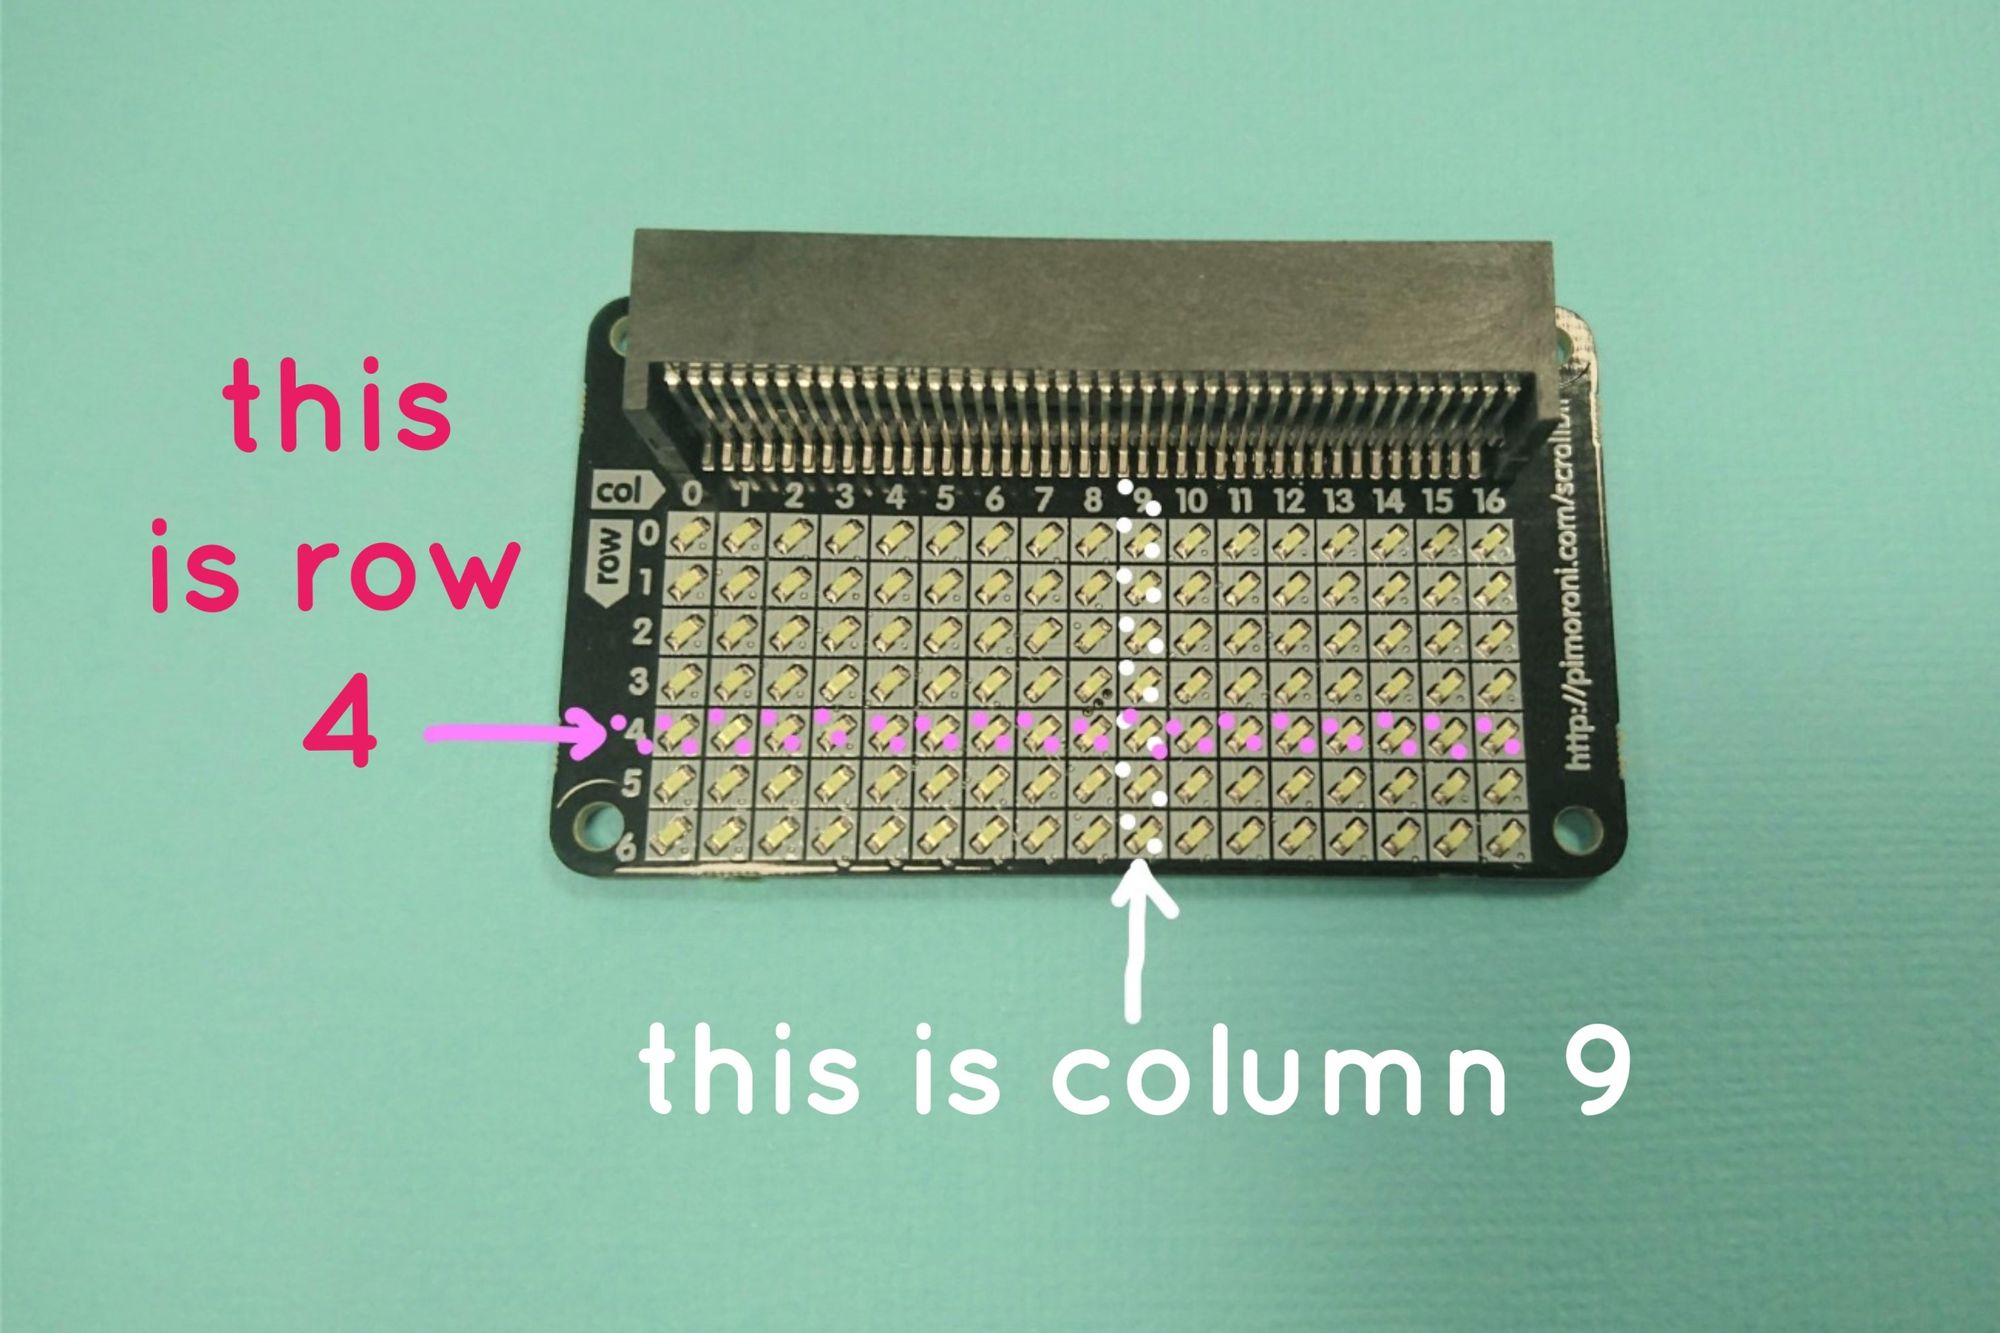
Using these grid numbers, you can say where you want the micro:bit to start drawing the icon.
By default, the code block puts the icon in column 0, row 0. If you used this code, it'd look like this.

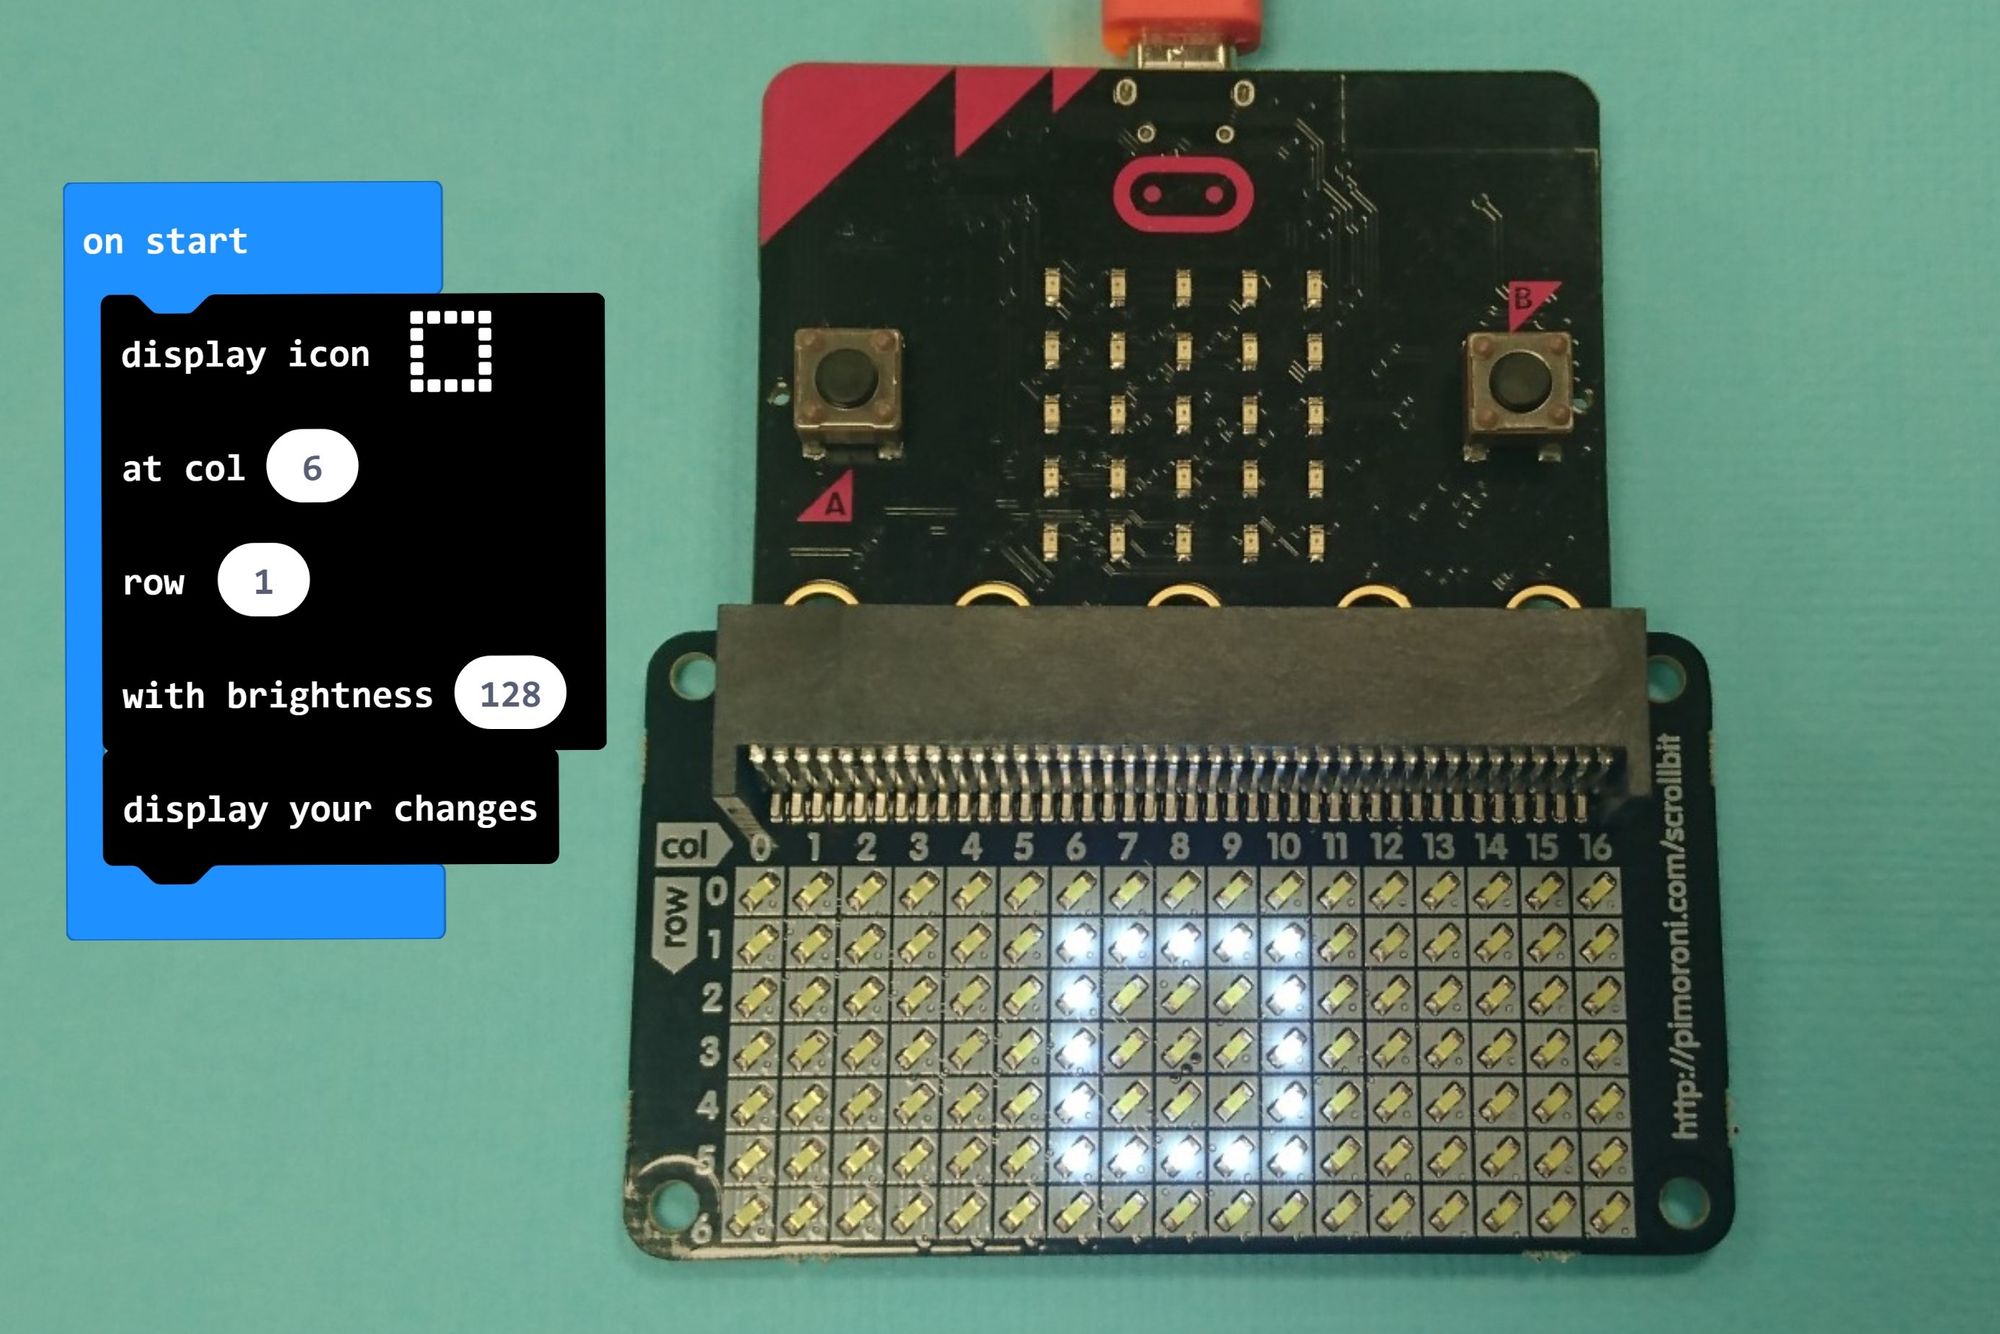
To make any of the 5x5 icons sit in the middle of the scroll:bit you need to start drawing the icon at column 6, row 1. Have a look at this picture to see why.
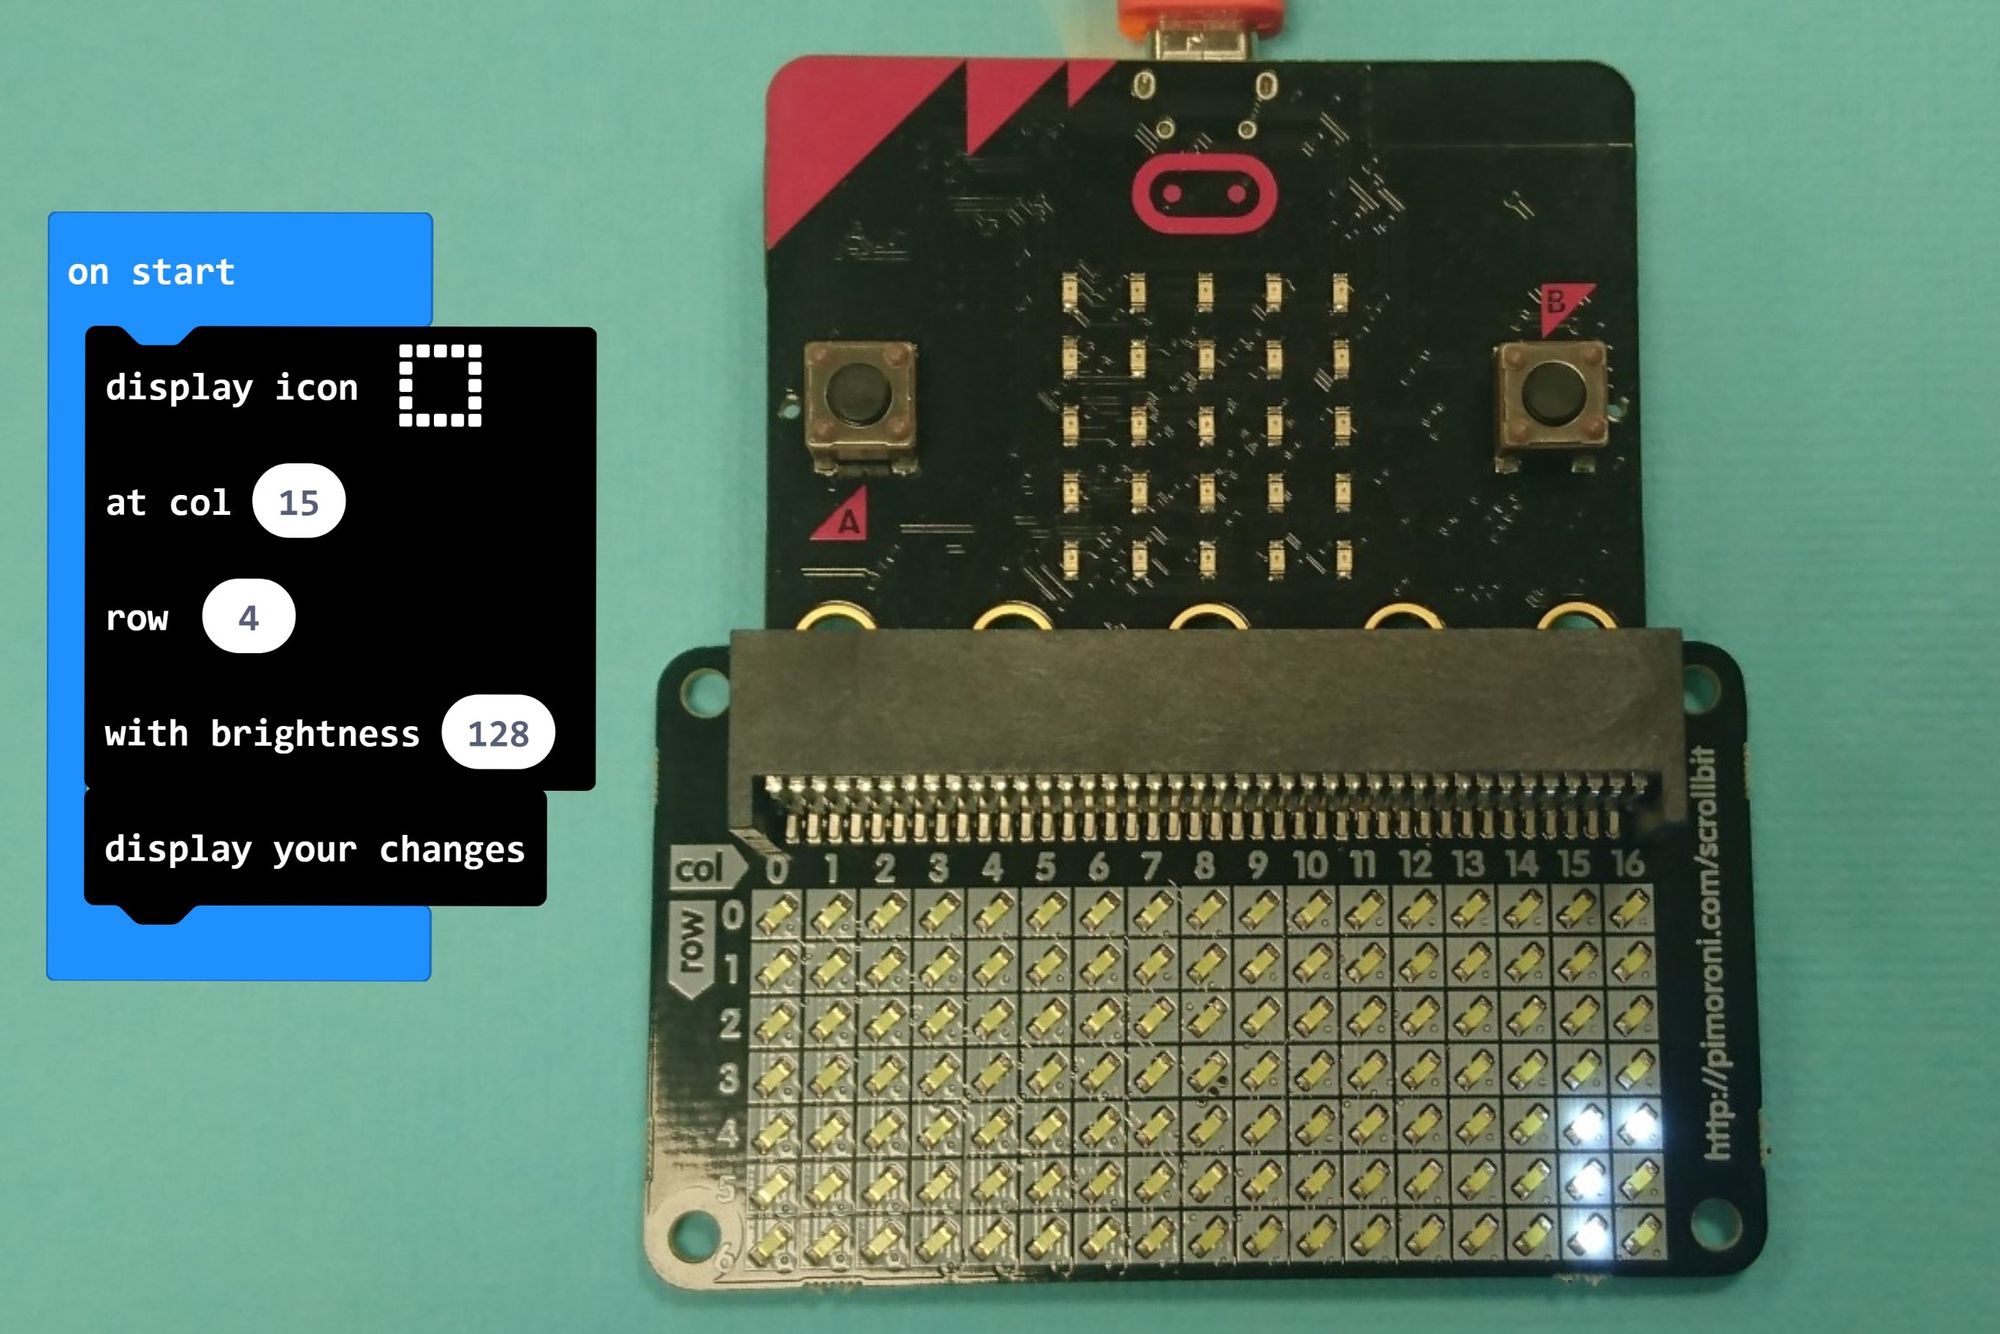
And one final example: here is the same icon (the square), but we've told it to start drawing at column 14, row 4. You can see the problem!
Download code
Here is the code we used:
Challenges
Use the printed grids to try out different positions for the 5x5 icons.
Which columns and rows is it "safe" to use as a starting point for the icon? Which columns and rows will cause the icon fall off the screen?
What happens if you were to use a bigger icon?
Download pdf of the scroll:bit grids and example icons
Click here to download a printable sheet for use in the classroom.