In this activity you will learn how to mix colours of light using just one LED and your micro:bit. If you prefer to do this using a Raspberry Pi, go here.
You will need:
a micro:bit
4 x crocodile clips
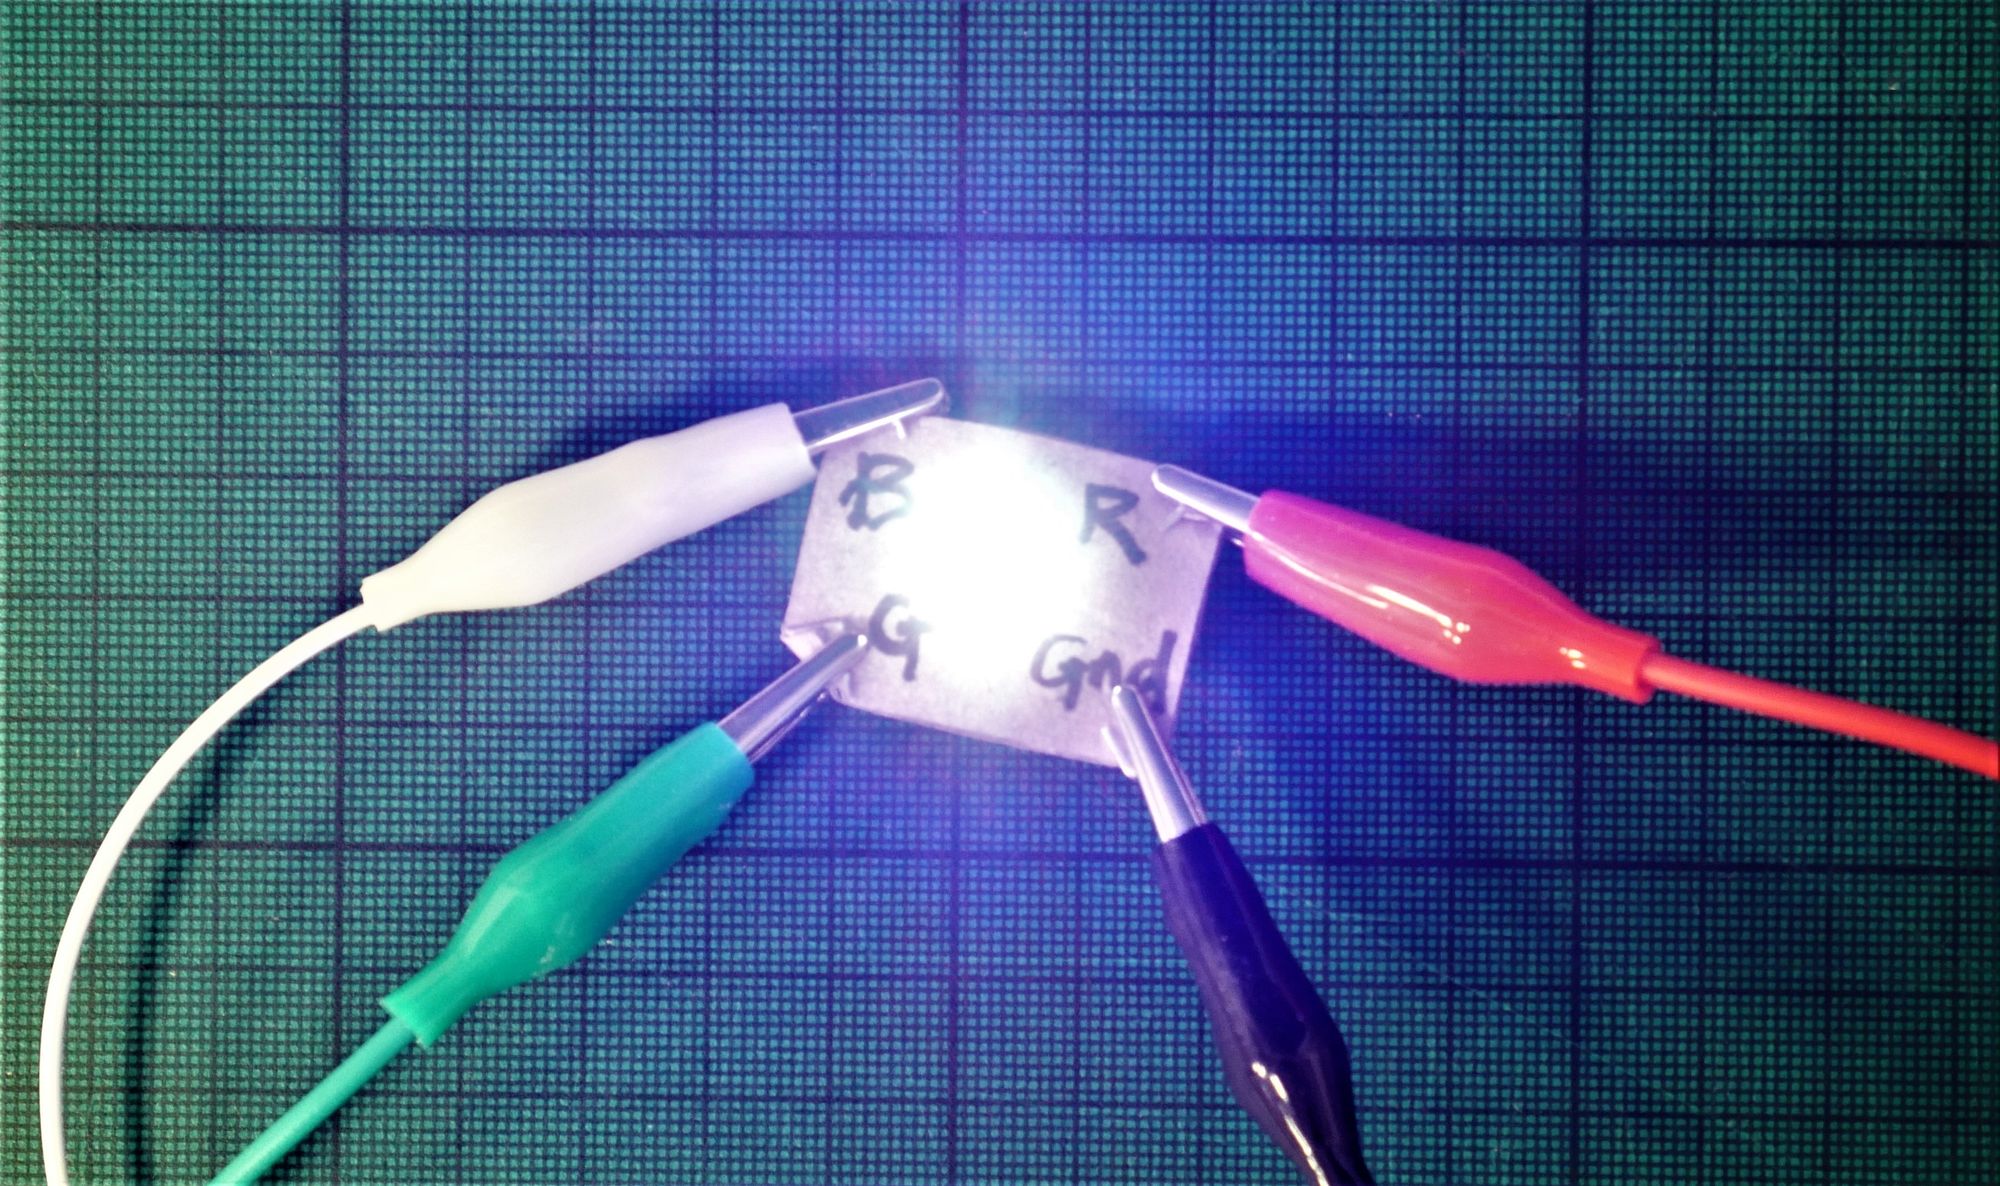
1 x LED board (see here for how to make one)
USB cable and laptop/device for programming
Bit of white paper, or a ping pong ball with a hole poked in it
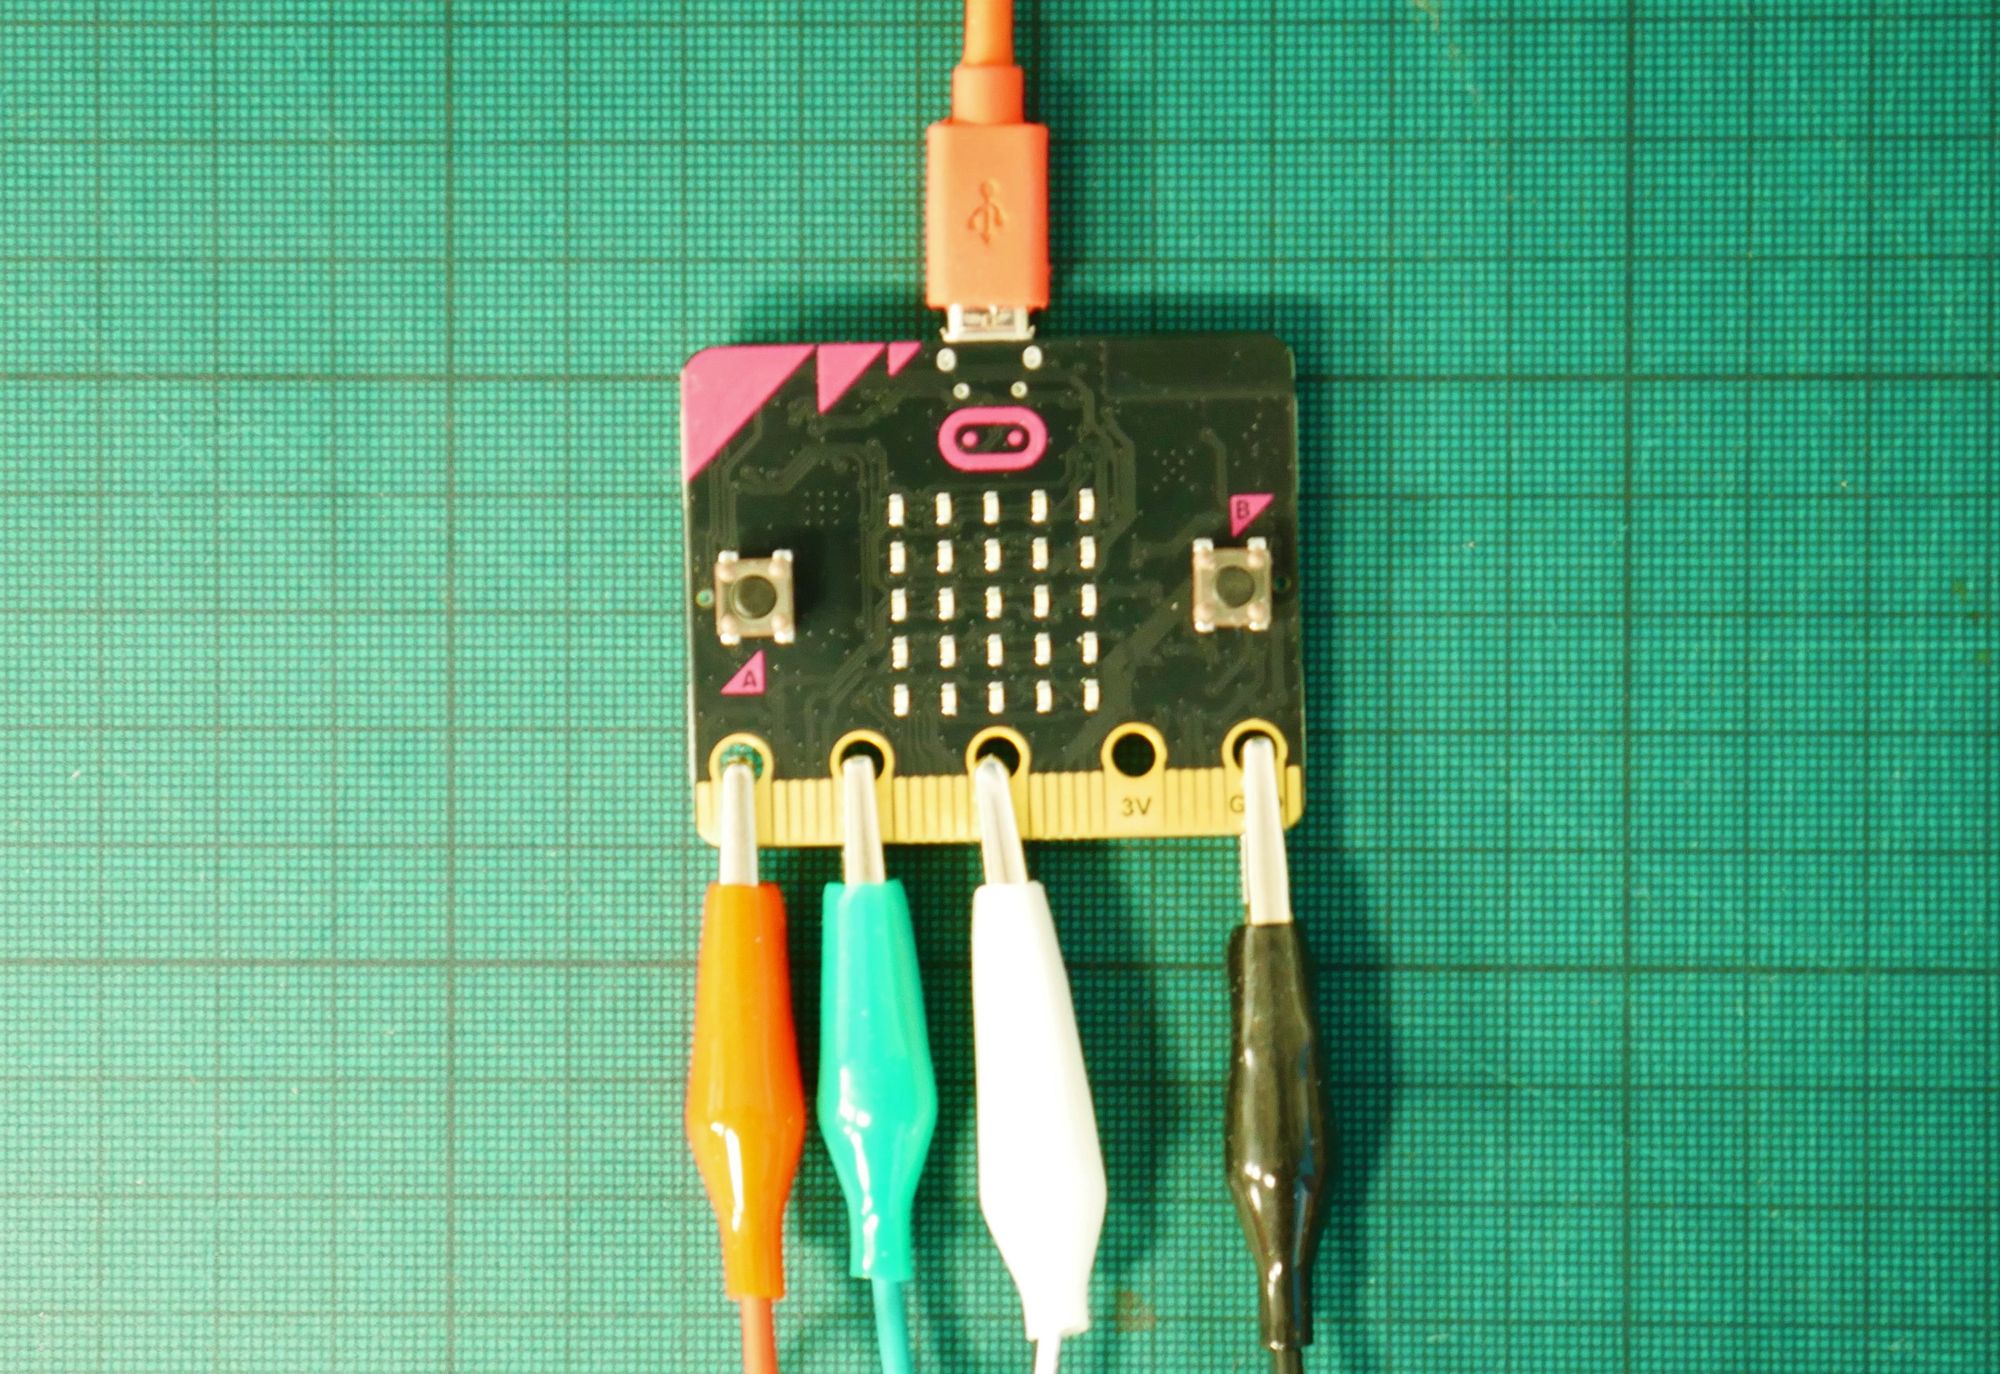
Make your connections
Connect up the LED board and your micro:bit as in the photos. Ground to Ground, Red to Pin 0, Green to Pin 1, Blue to Pin 2.
How this is going to work
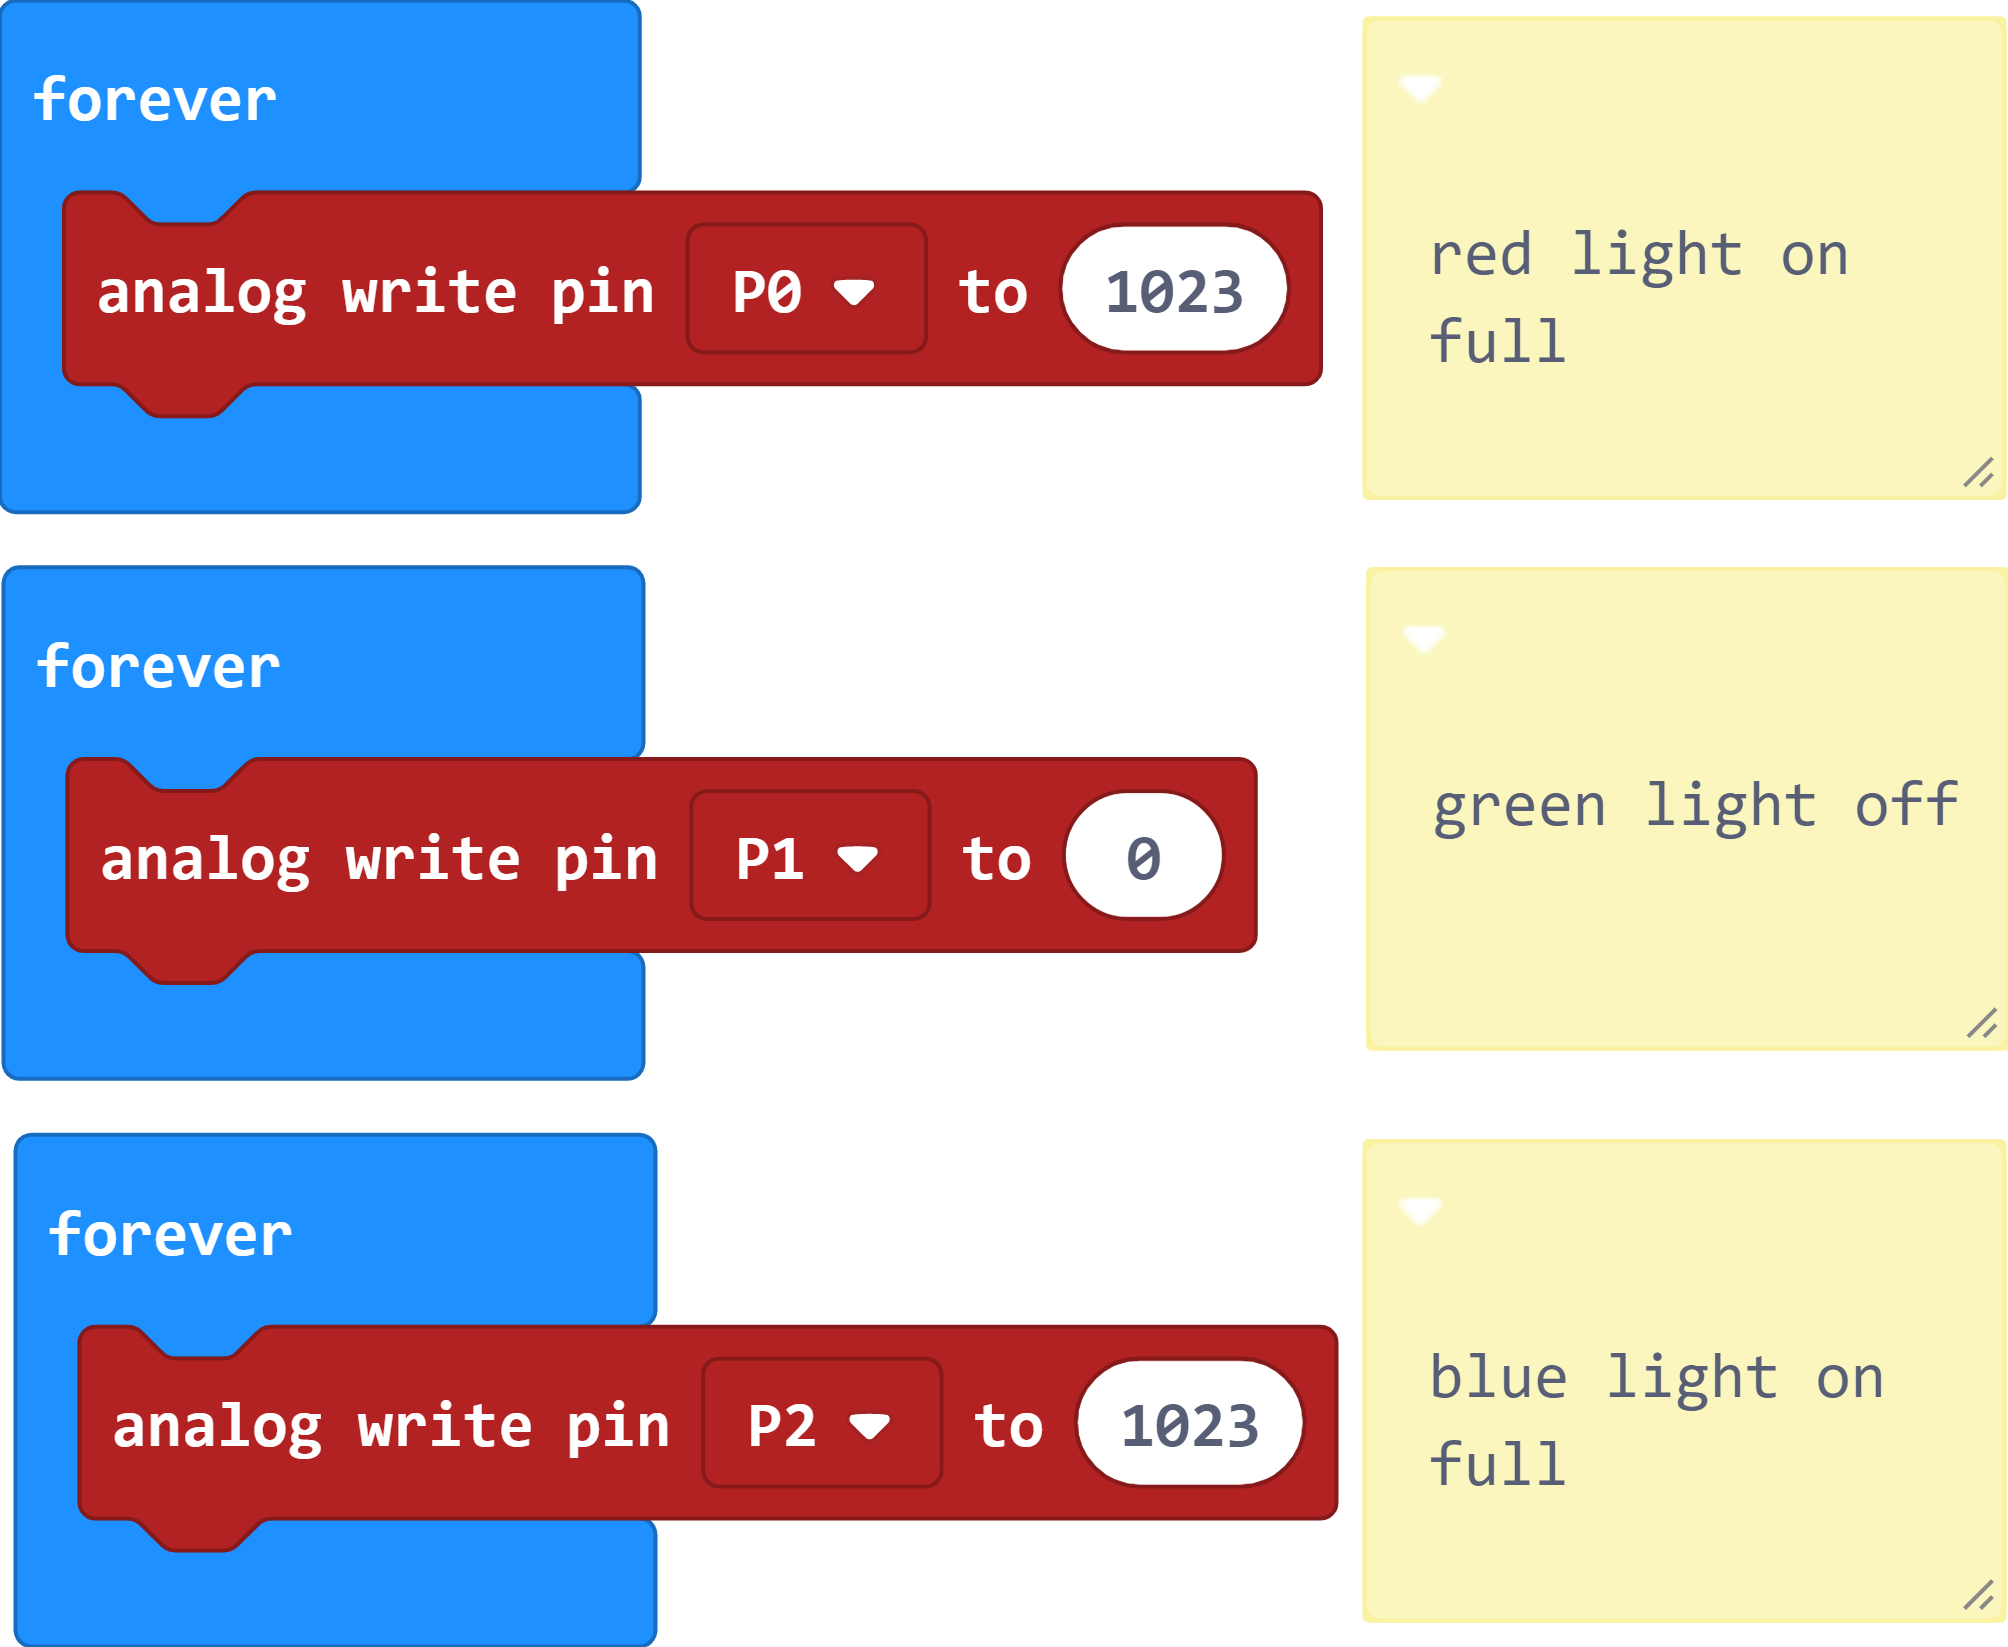
The micro:bit can't vary the voltage on the pin, it can only send 3.3v, or 0v. This means we can send the red part of the LED 3.3v, or 0v - on or off. To mix colours we need to be able to send a little bit of red, some more red, lots of red, etc.
The way to get around this is to do PWM (Pulse Width Modulation), which is a fancy way of saying turn it off and on again really quickly. How long you leave it on for is the "pulse width", and so if you do long pulses with little gaps it's like sending a lot of red. Short pulses with big gaps is like sending a little bit of red. It happens so fast your eye is tricked into thinking you're turning the voltage up and down instead of on and off. If you have sensitive vision you may be able to see the flicker. Handily PWM is built in to the block code library - you just need to use analog blocks.
Writing the code
Using the block coding on makecode.com, or the makecode app, start a new micro:bit project.
We need three bits of code to run at the same time - one to control each colour. You will find the red blocks in the "Pins" part of the menu, and the blue blocks in "Basic".
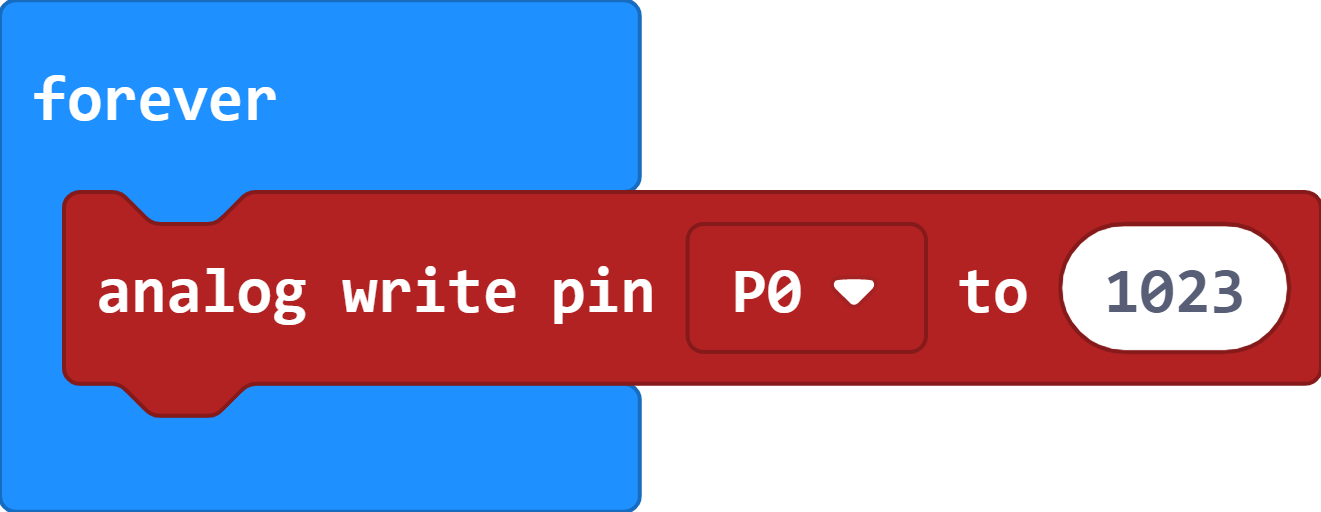
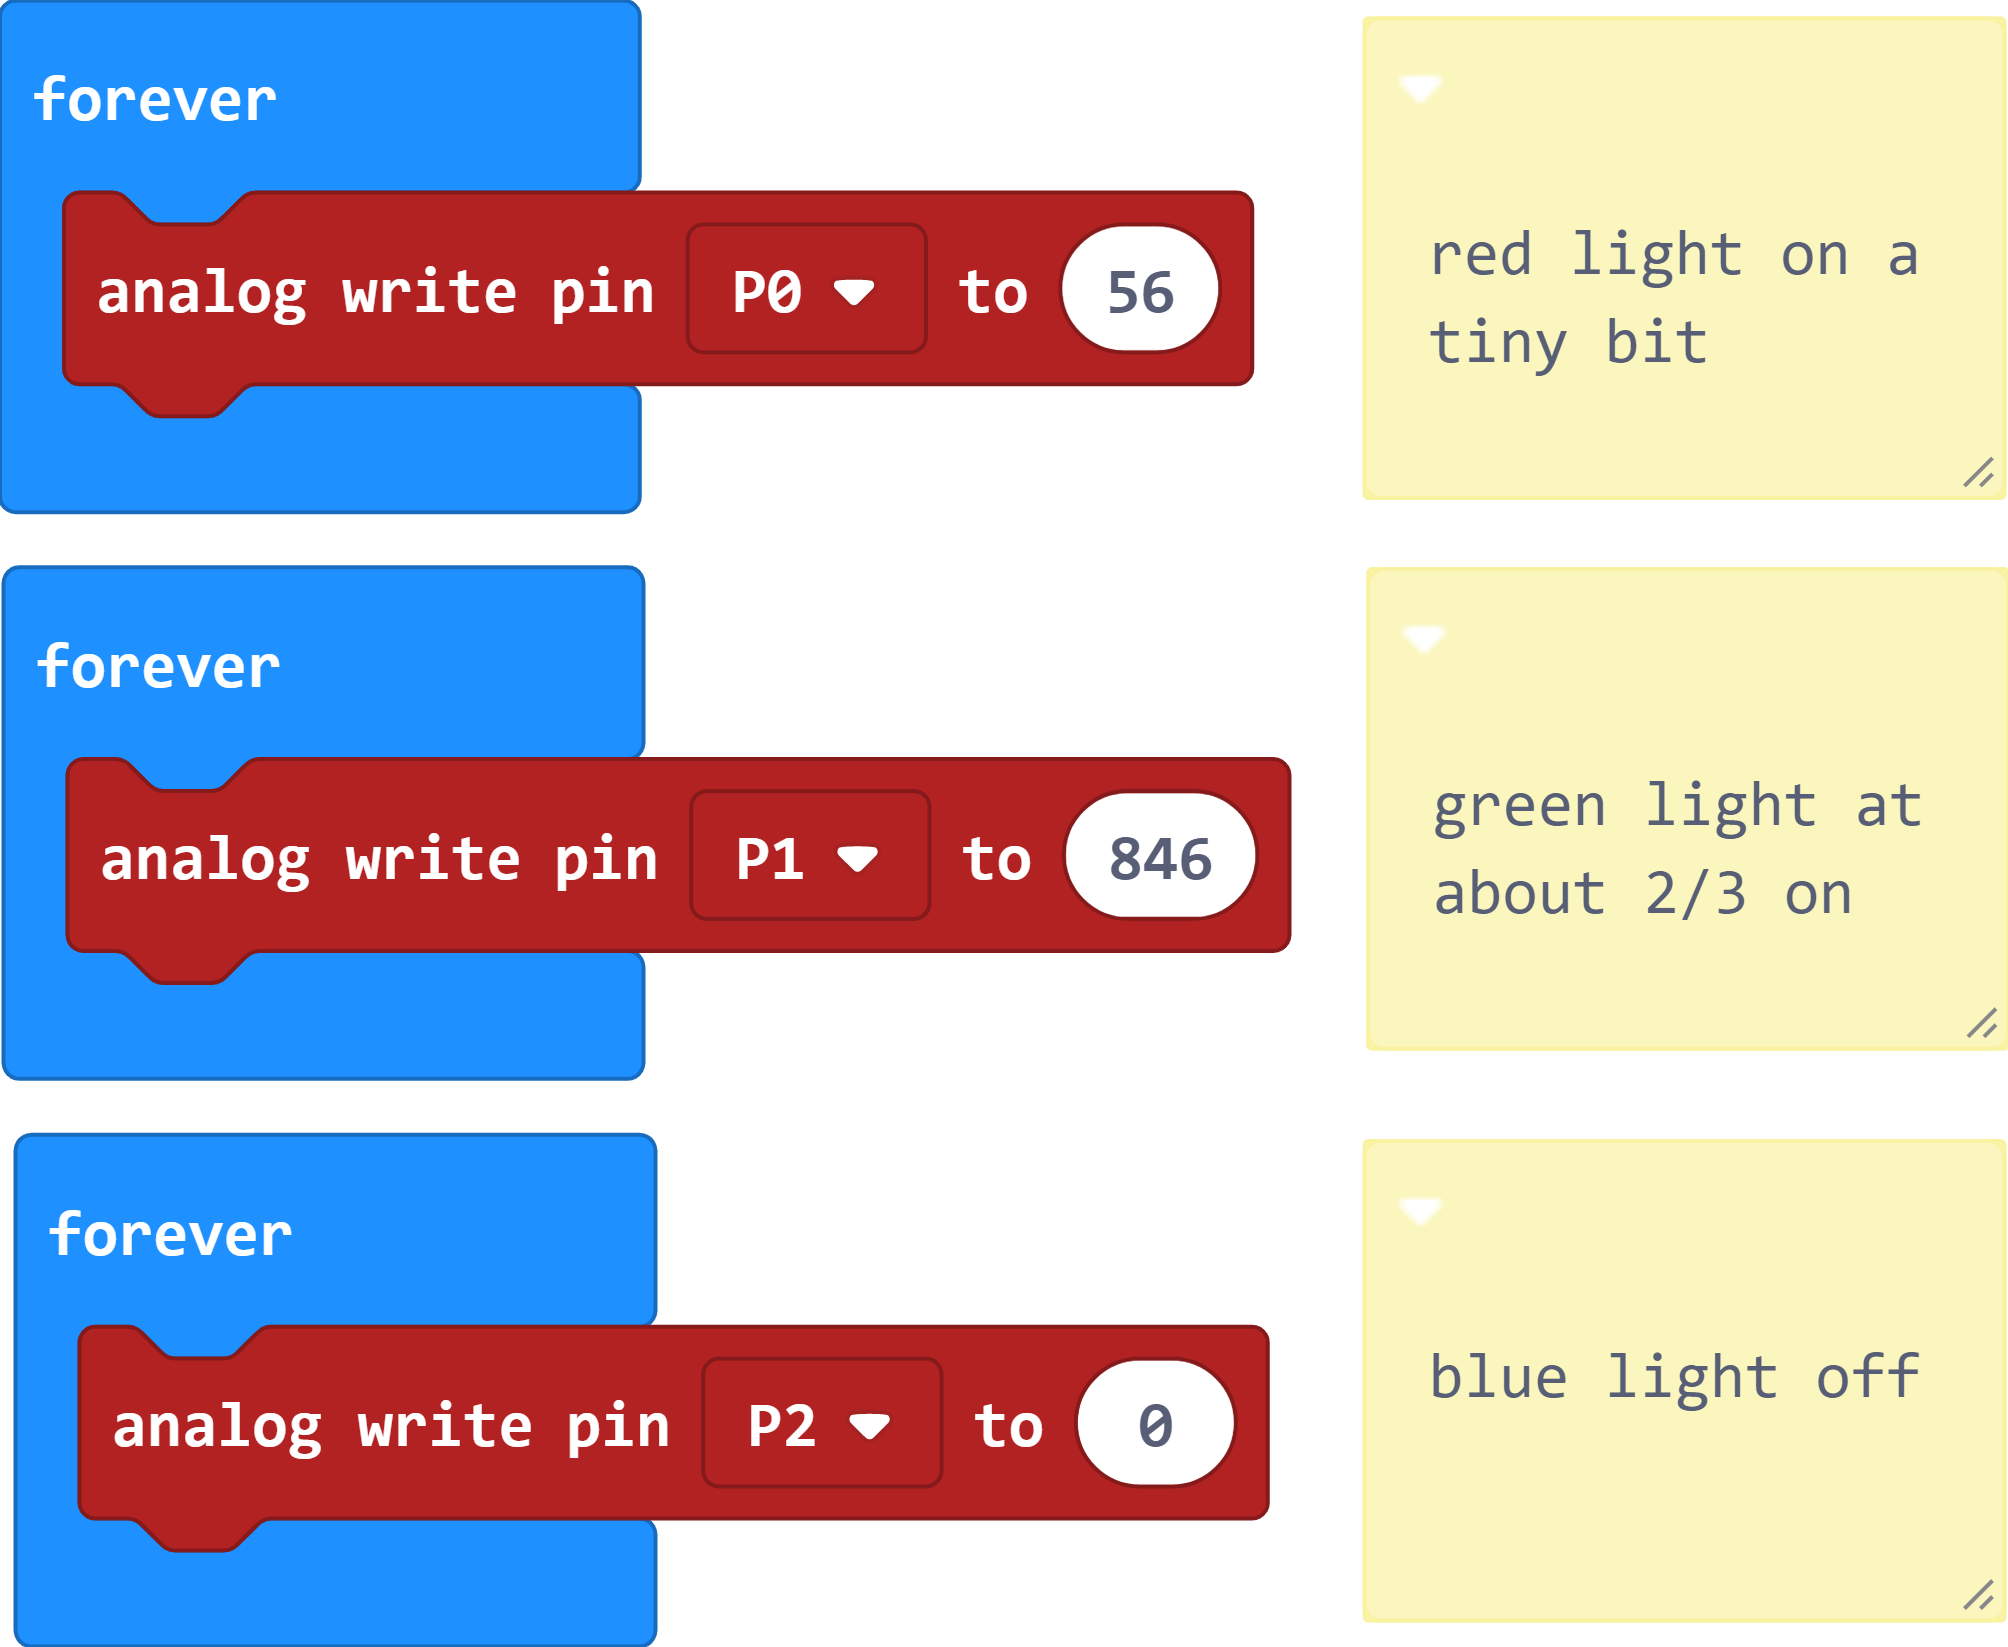
Once you have your three bits of code, you will find that if you click on the value in the white box, you can change it by typing, or by dragging the slider left and right. In this example, we have set Pin 1 (the green light) to zero.
Remember to download your code. If you are not sure how to do this, here's a quick start guide (just select which system you are using).
Tasks:
1. What happens when all of the pins are set to full power?
2. What happens when all of the pins are turned off?
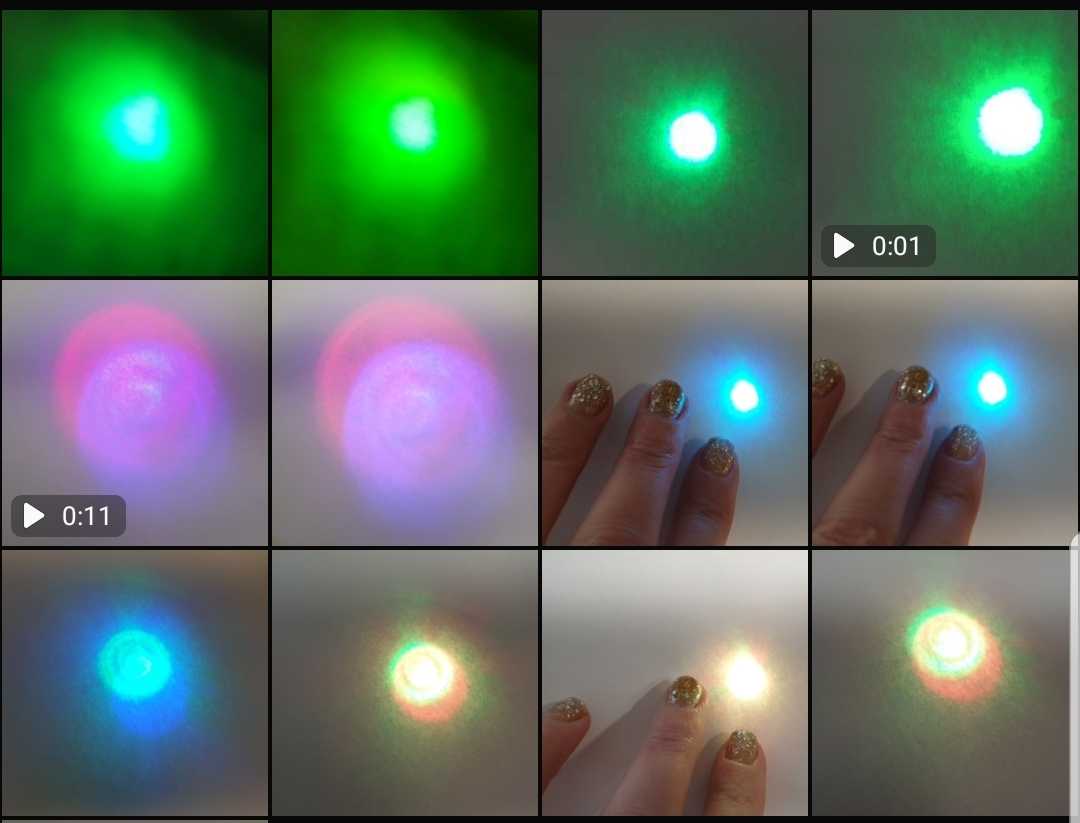
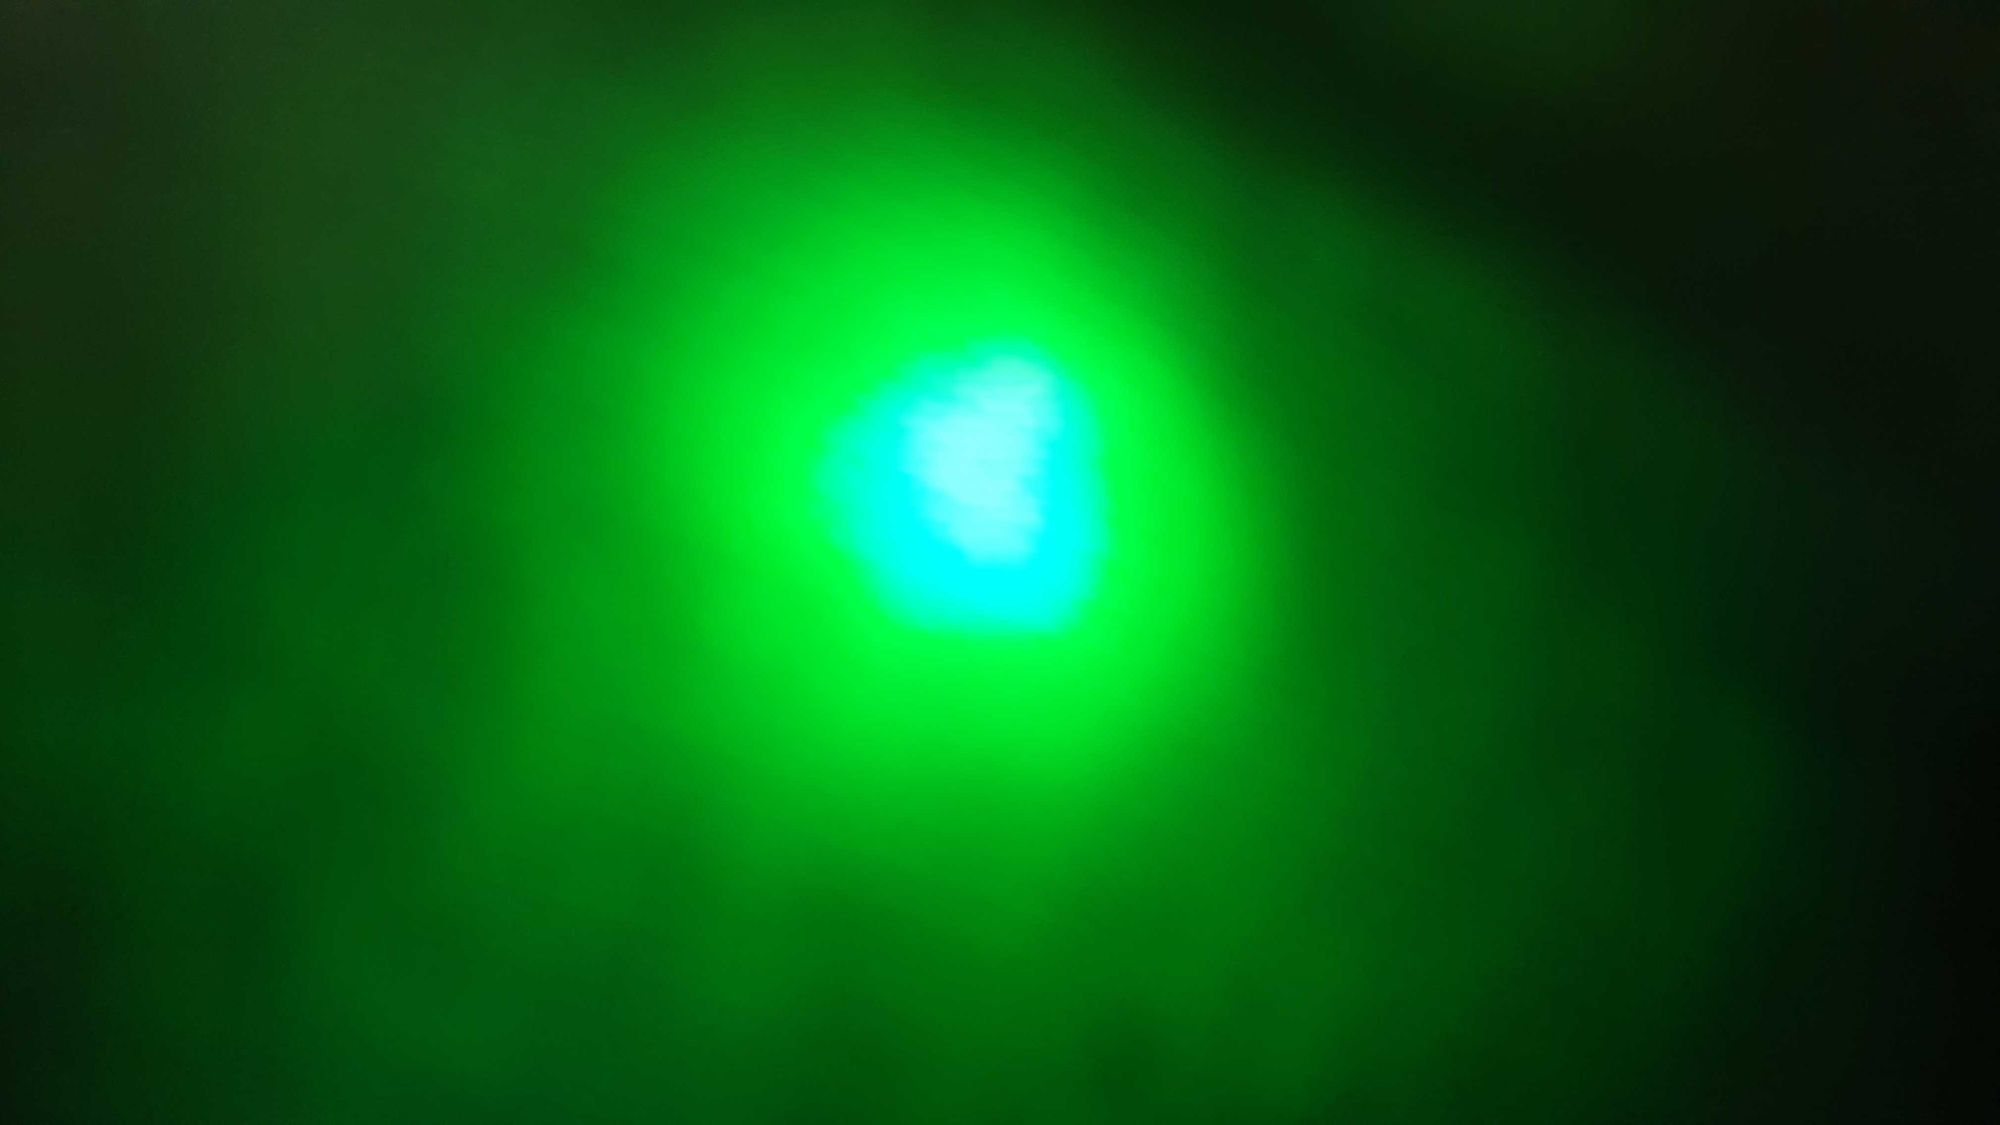
3. Using just on (1023) and off (0) - can you find the secondary colours of light? The secondary colours of light are magenta (pinky purple), yellow, and cyan (light blue).
4. Once you have found magenta, try making violet (a bluey purple).
5. Try different values for the red, green and blue, and see what your bulb shows.
Here are some colours from the internet, with their names and numbers to show how much of each colour light to mix in.
eg Lime Green

Downloadable resources:
These instructions as a pdf
How to build the RGB board (pdf)
A video of how to make the RGB board (YouTube link)
Black and white worksheet / handout without the long explanation (pdf)
The code (takes you to the makecode project)
Where to find the items on the shop:
LEDs (we used clear, but the diffused ones mean you don't need a bit of paper)
Crocodile clips (Set of 10, will do you for two boards)
Micro:bit