It's currently snowing in Sheffield, so we thought we'd combine a couple of our add-on boards for the micro:bit and make an scrolling weather station.
One micro:bit will be stuck outside, while the other will be inside the office, telling us whether we're going to need full arctic gear.
You will learn:
How to make two micro:bits communicate using radio, how to take a temperature reading with the enviro:bit, how to display scrolling text and numerical data on the scroll:bit.
You will need:
Two micro:bits, an enviro:bit, a scroll:bit, a sealable food bag or container, a battery pack for the micro:bit. Optional - cardboard box and art materials to fancy up the inside display.
How to code the outside microbit
The micro:bit outside needs to take a temperature reading at regular intervals, and radio the number to the other micro:bit that is inside. In pseudocode, this is:
Take temperature reading
Send temperature reading
Wait a bit
Repeat
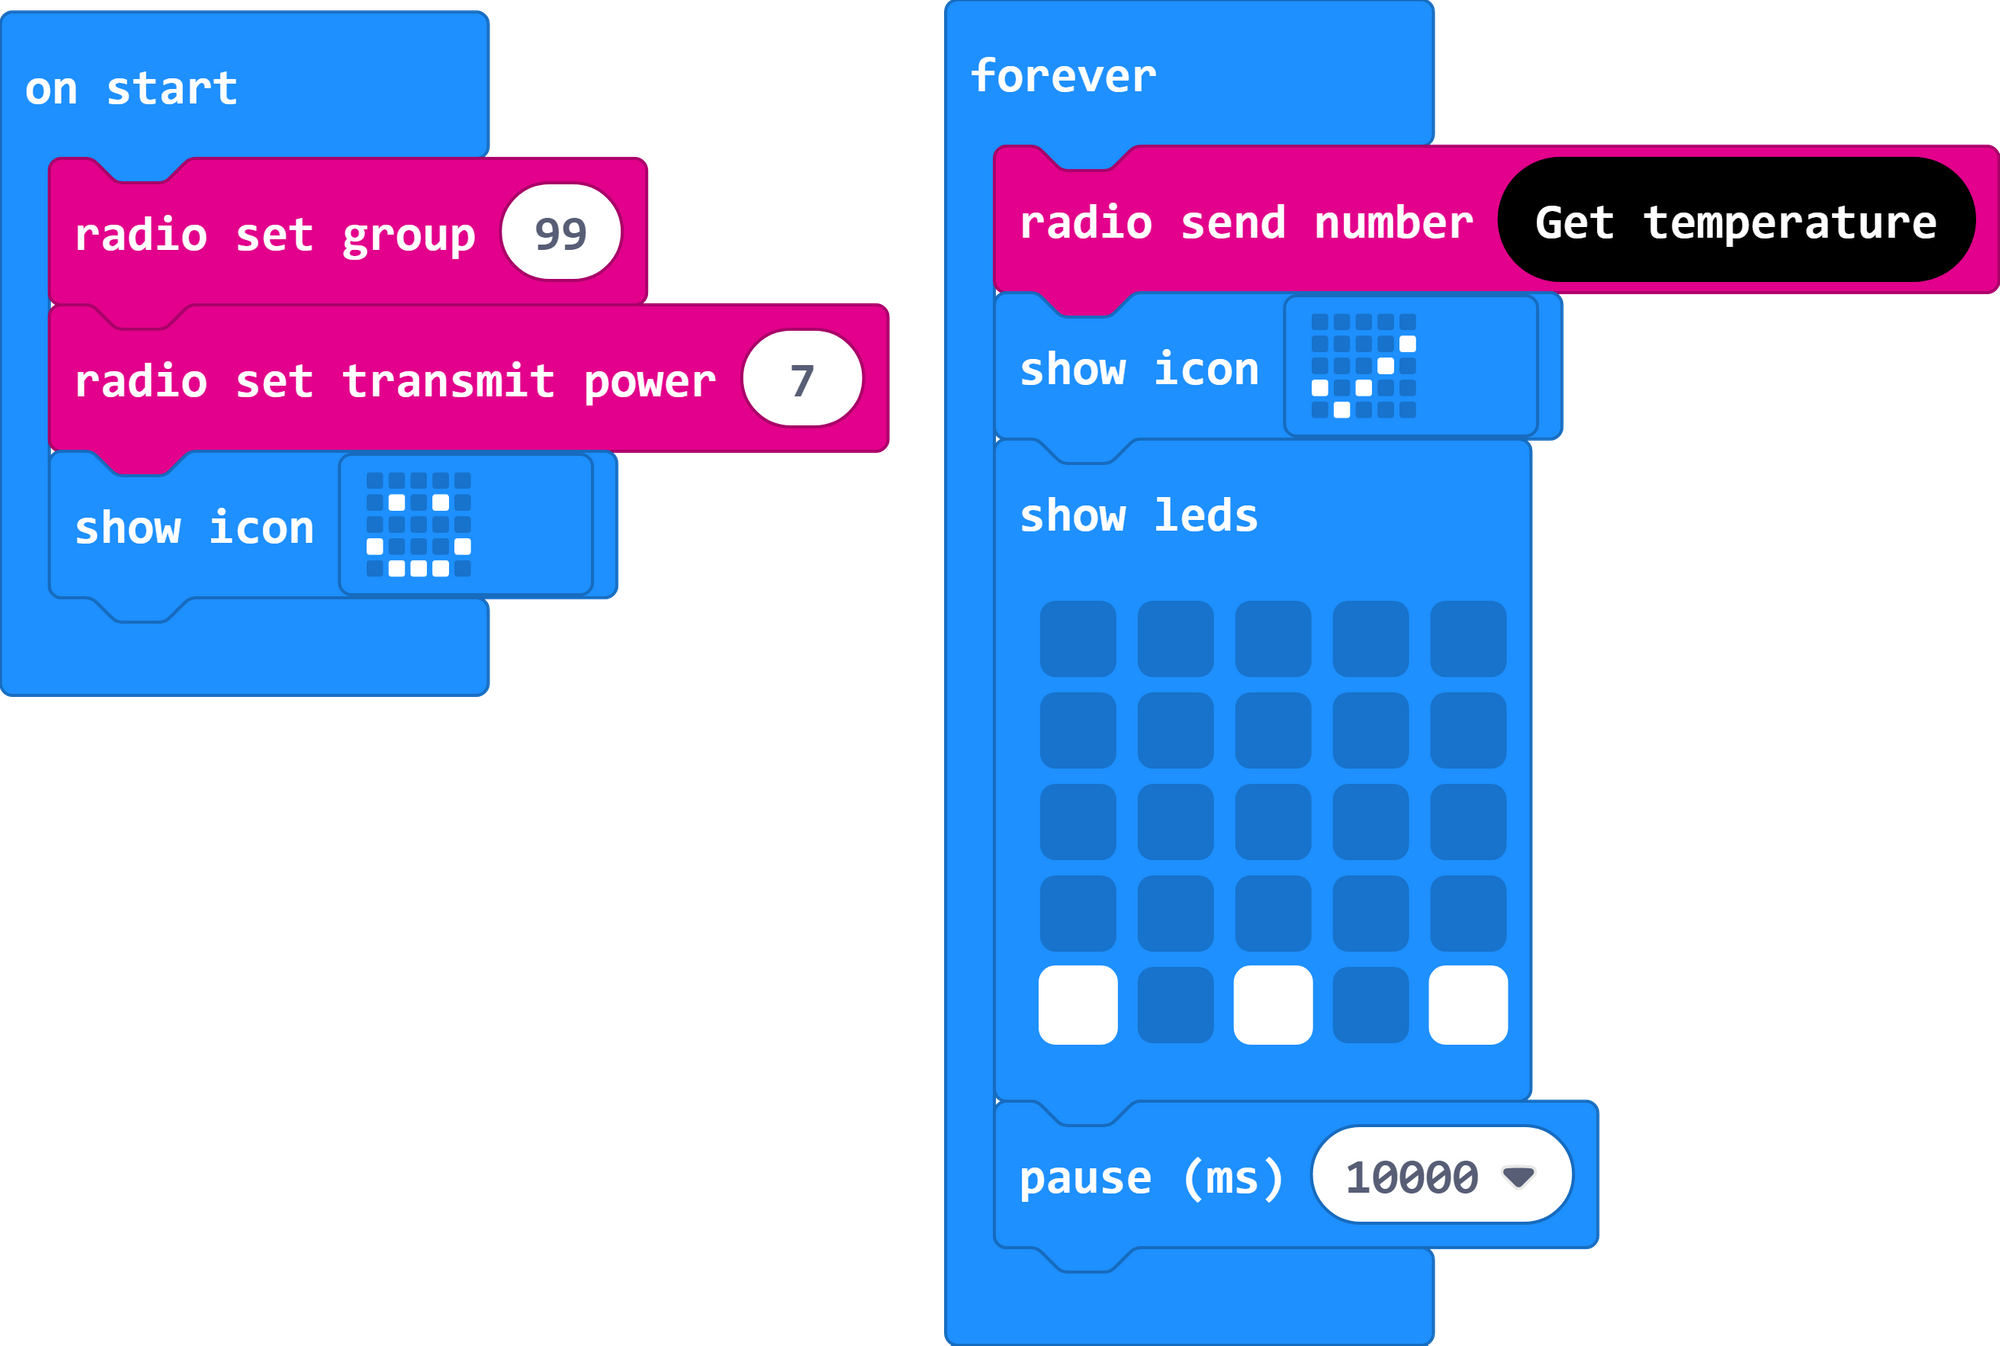
First, we need to set up the radio. You can pick any number between 0 and 255 for the channel - it doesn't matter what you choose, as long as you use it on the other micro:bit. We're going to use 99.
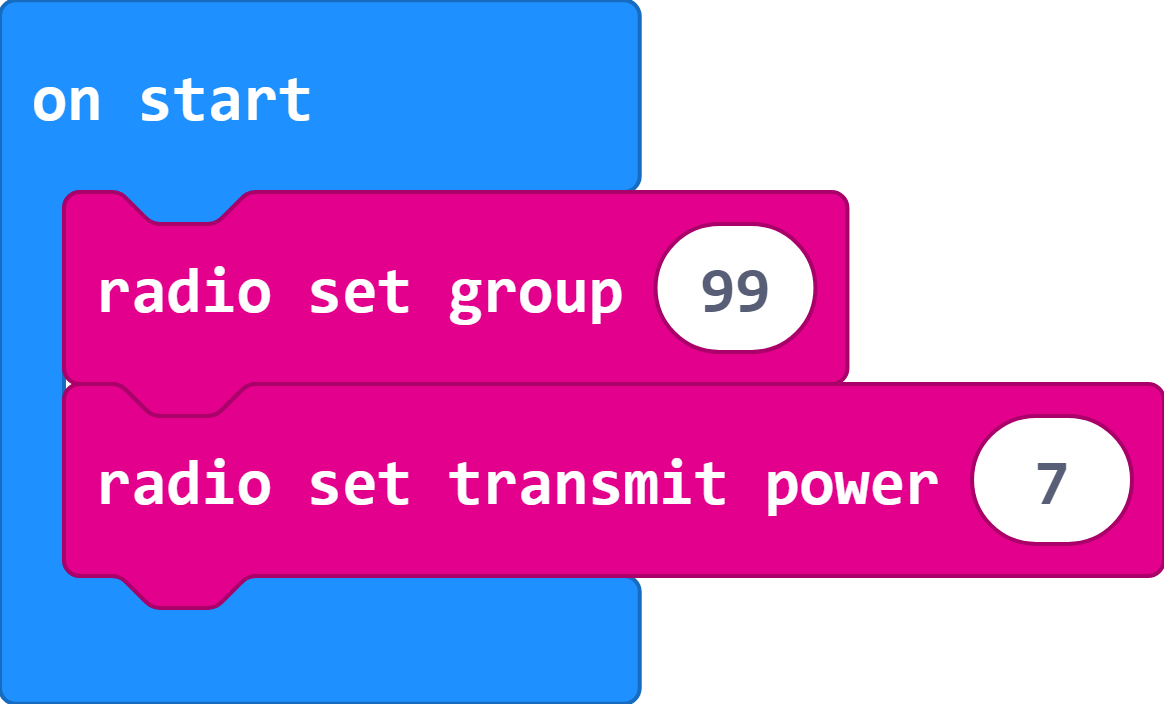
The transmit power goes up to 7, which is how strongly the signal is sent. If your micro:bits are right next to each other, you could turn this down to save power, but since ours is on the other side of the window, we've set it to full power.
Next we should take a "forever" block, so that it repeats what it's doing, as long as it's switched on.
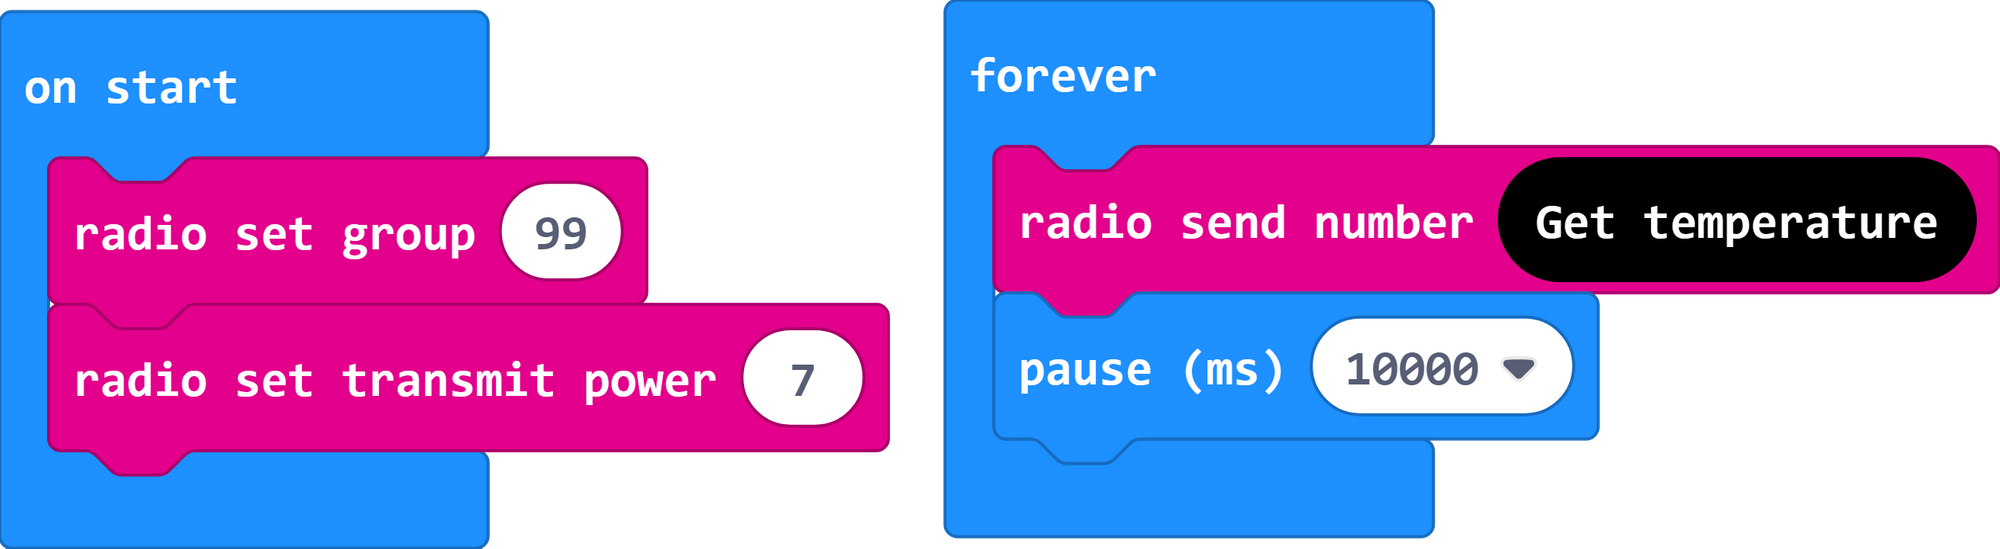
Inside that block, we've asked it to send the temperature number it reads from the enviro:bit, then wait for 10 seconds.
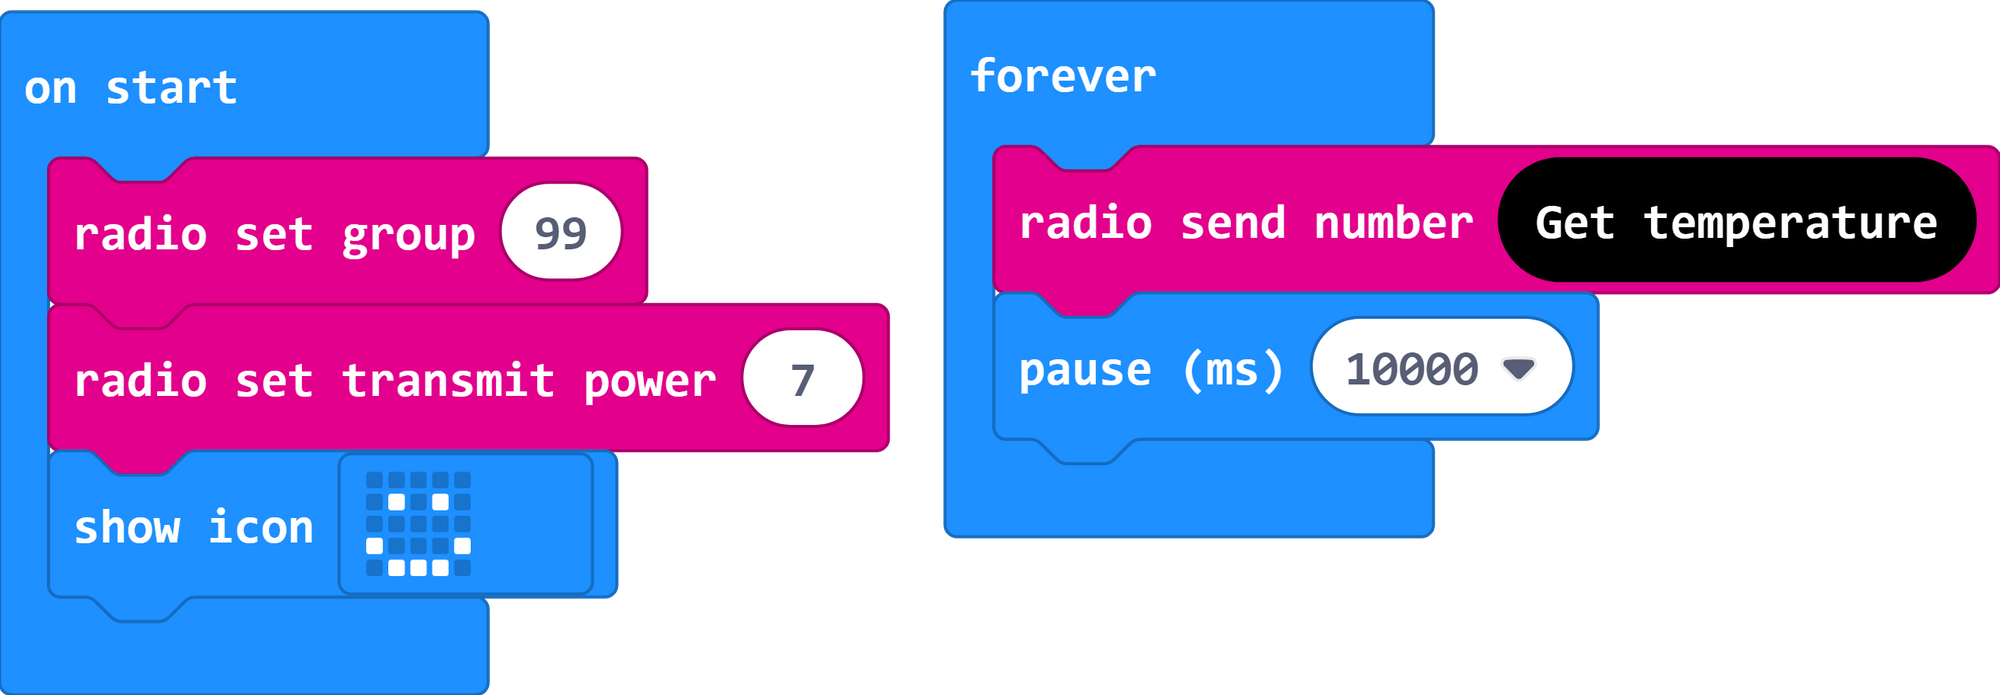
This will work on its own, but it is best to put in some visual feedback so you know when the micro:bit is doing things. When it starts up, we could give it a smiley face to show it's ready.
And when it's sent the temperature, it could show a tick, then go to an ellipsis (that's the dot dot dot punctuation you see in books).
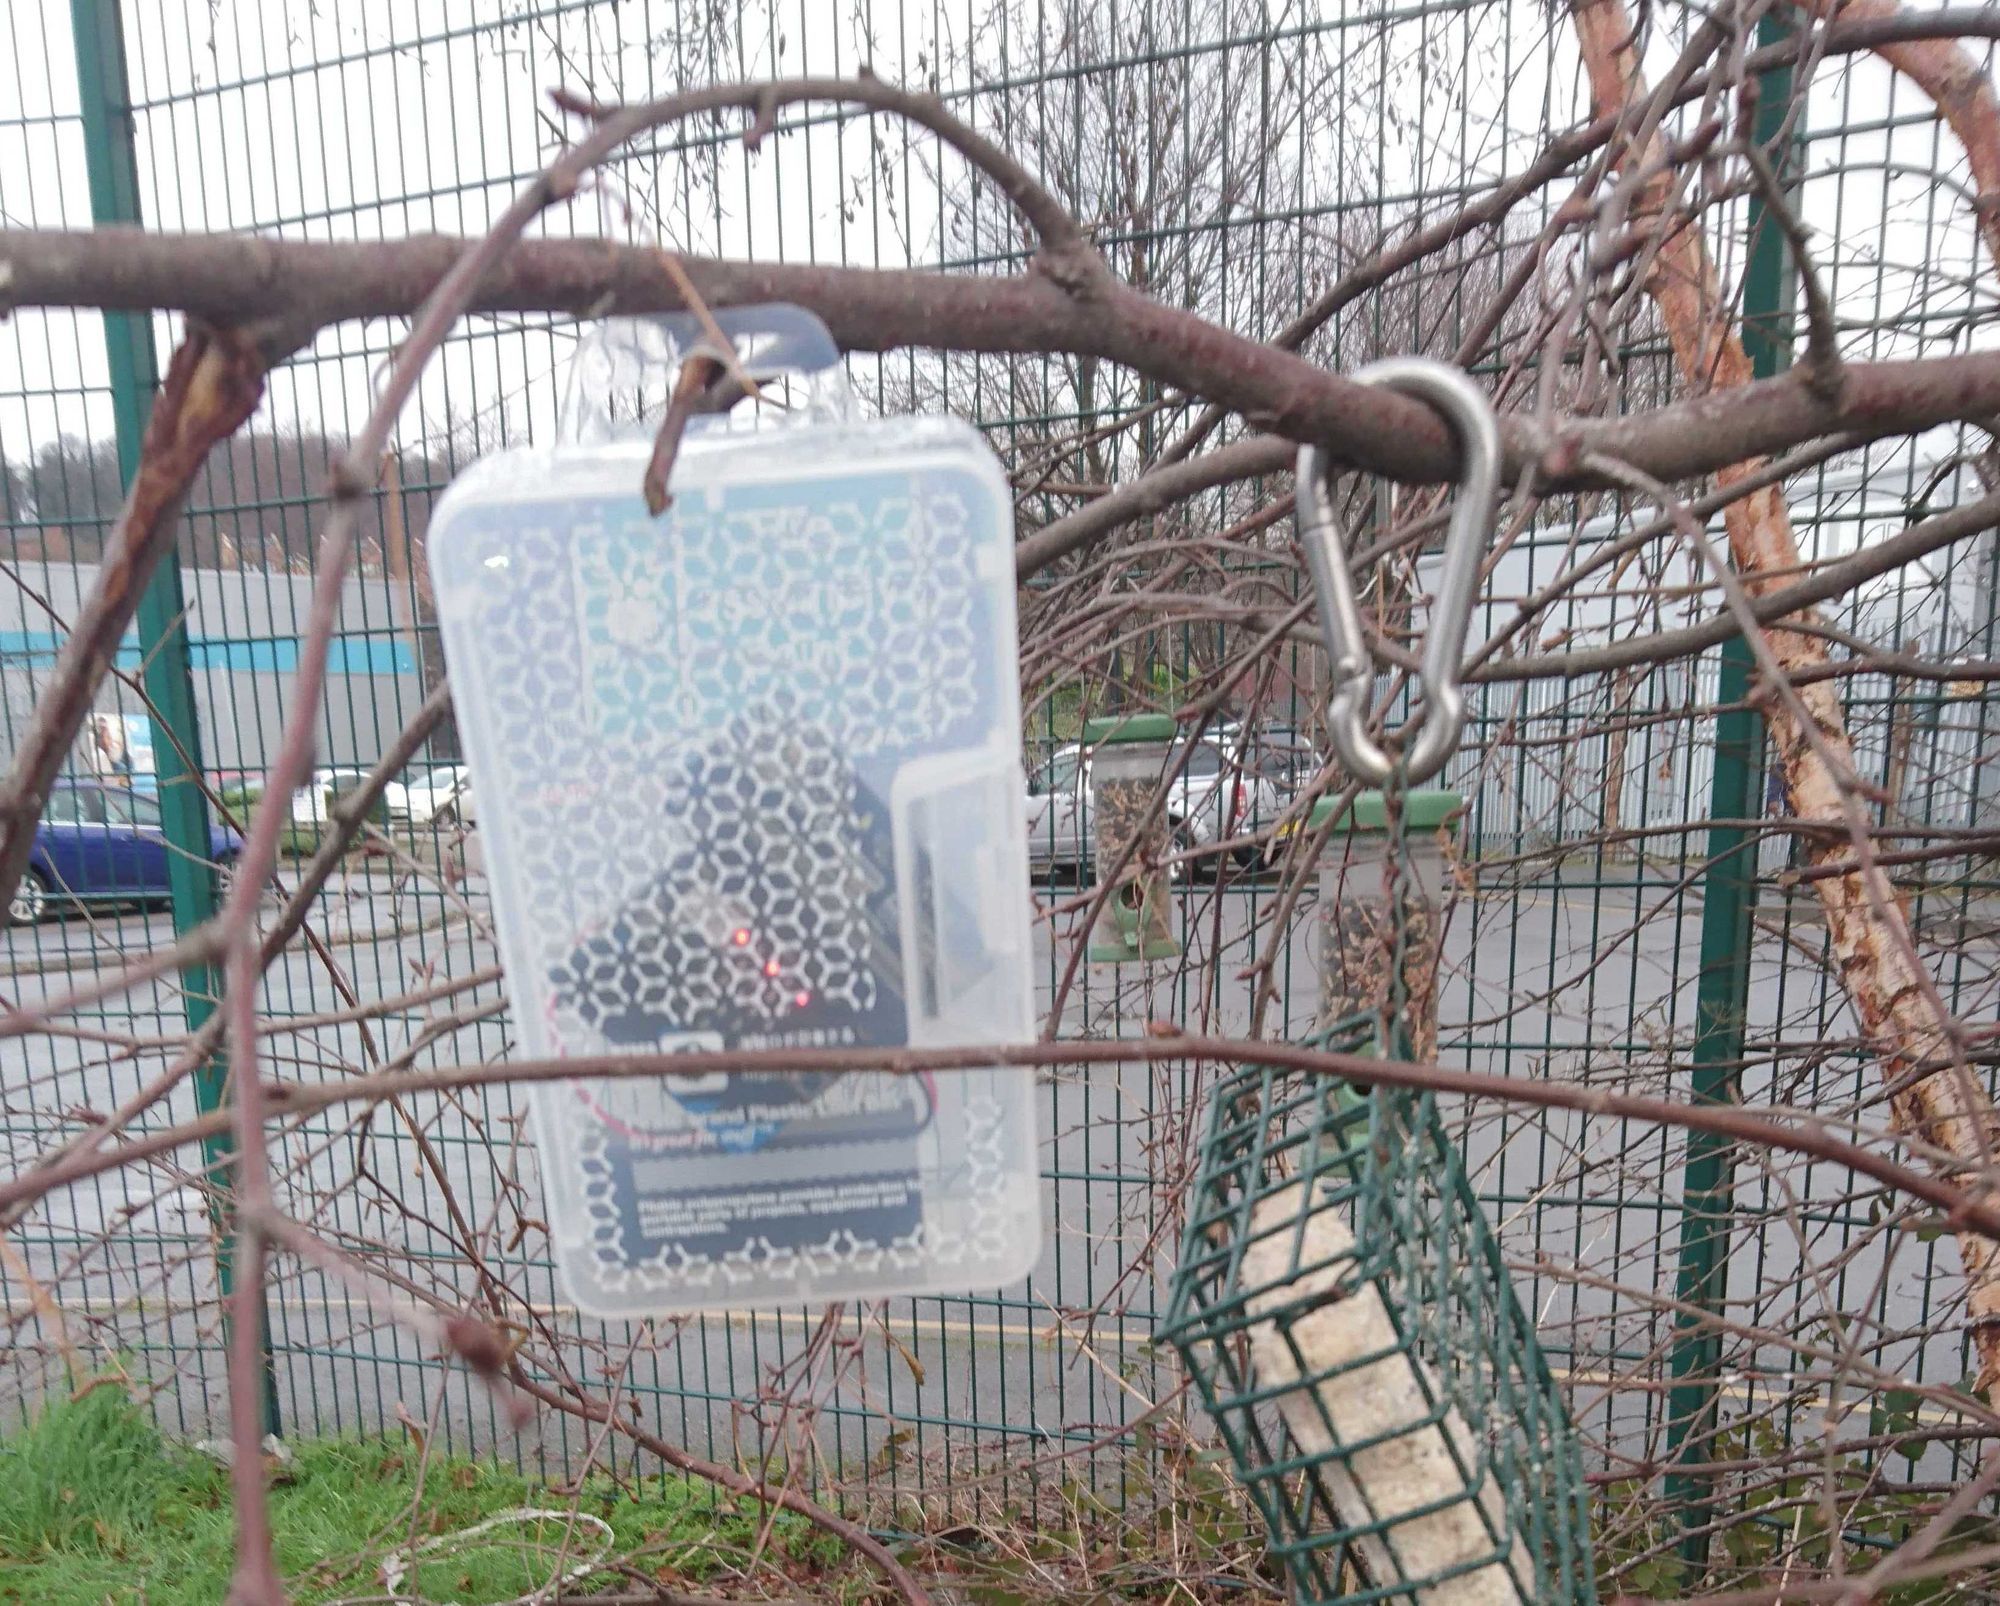
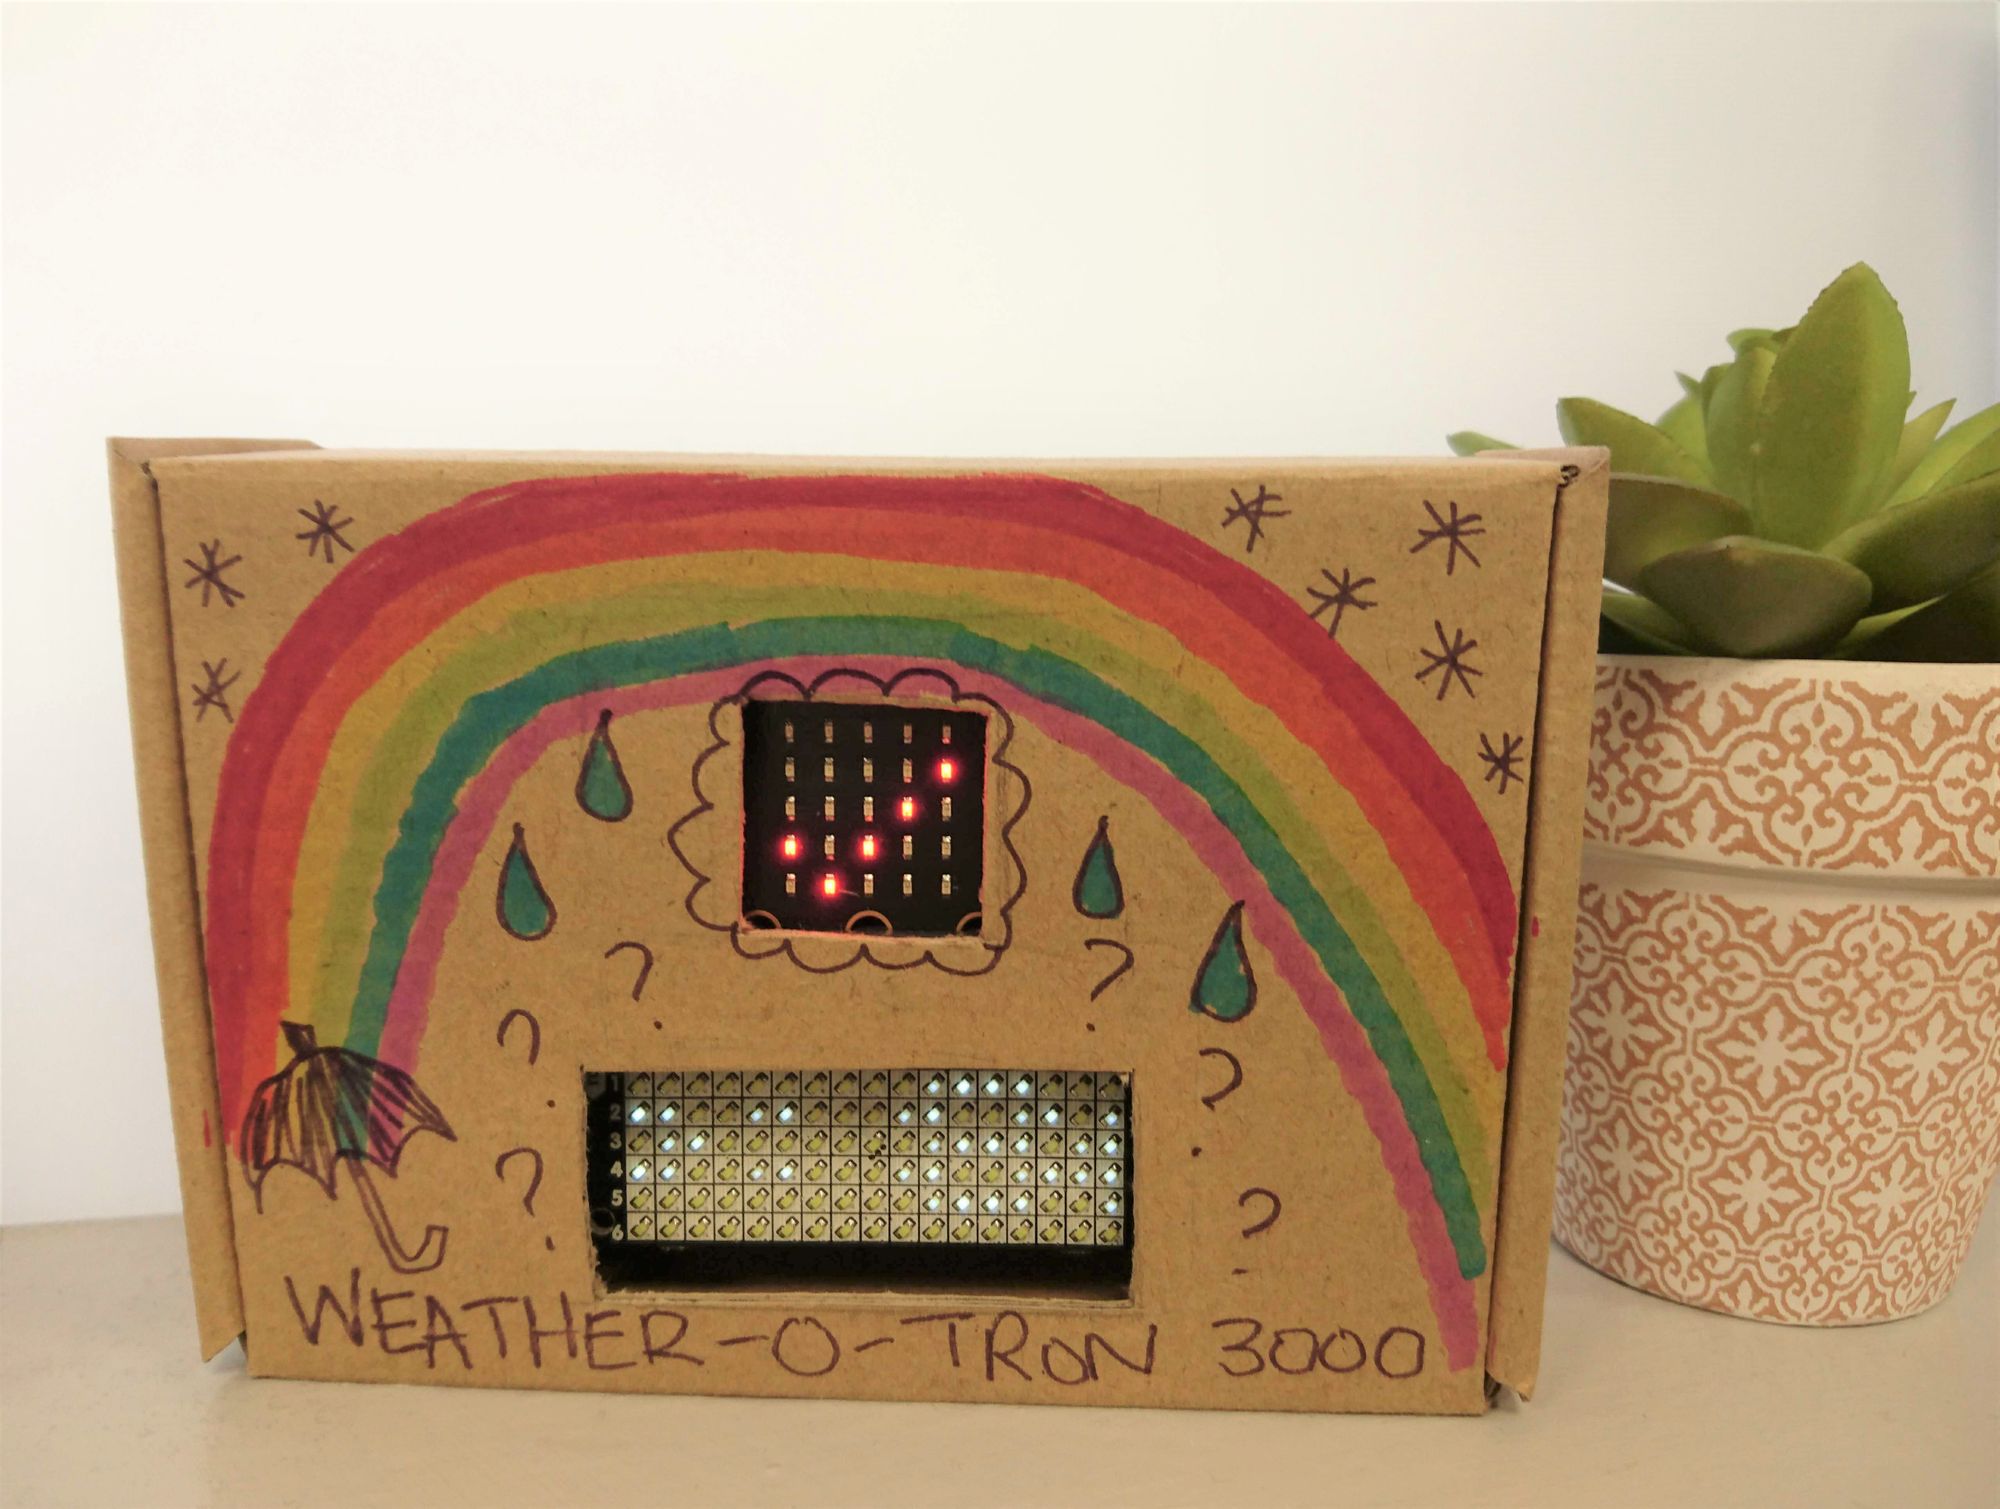
This is it for the first micro:bit. Once you've copied the code across, push on the enviro:bit, attach a battery pack, pop the whole thing in a food bag or a sandwich box, and find somewhere safe to put it outside. (We started with a sandwich box but it also worked with a Loot Box and we confused the birds!)
How to code the inside micro:bit
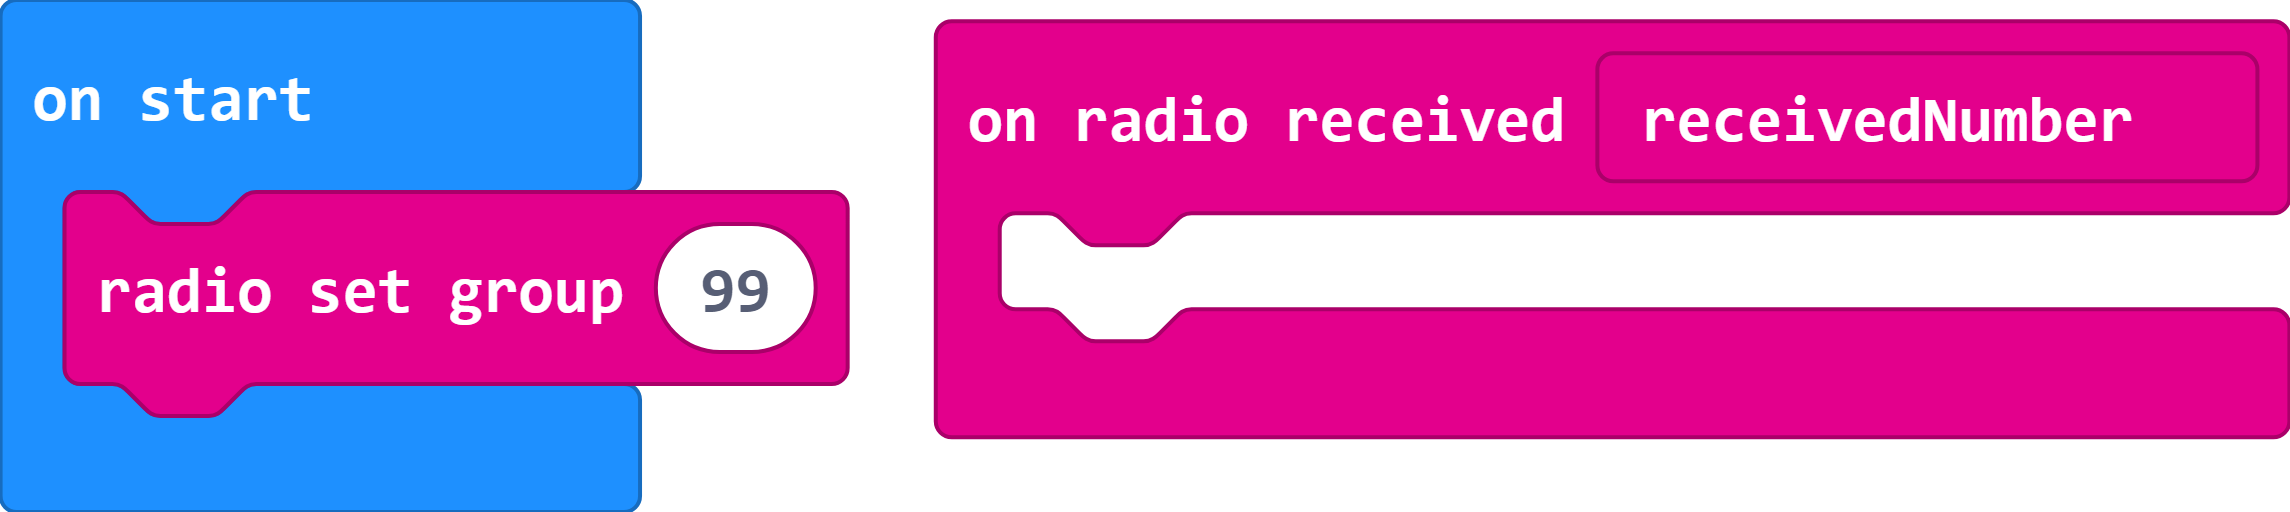
Firstly, we need to set up the radio channel to be the same as the channel the other micro:bit is sending on. Make an "on start" block with the channel instructions in like last time.
This time, instead of "forever", we'll use a block that does something when it receives a radio signal.
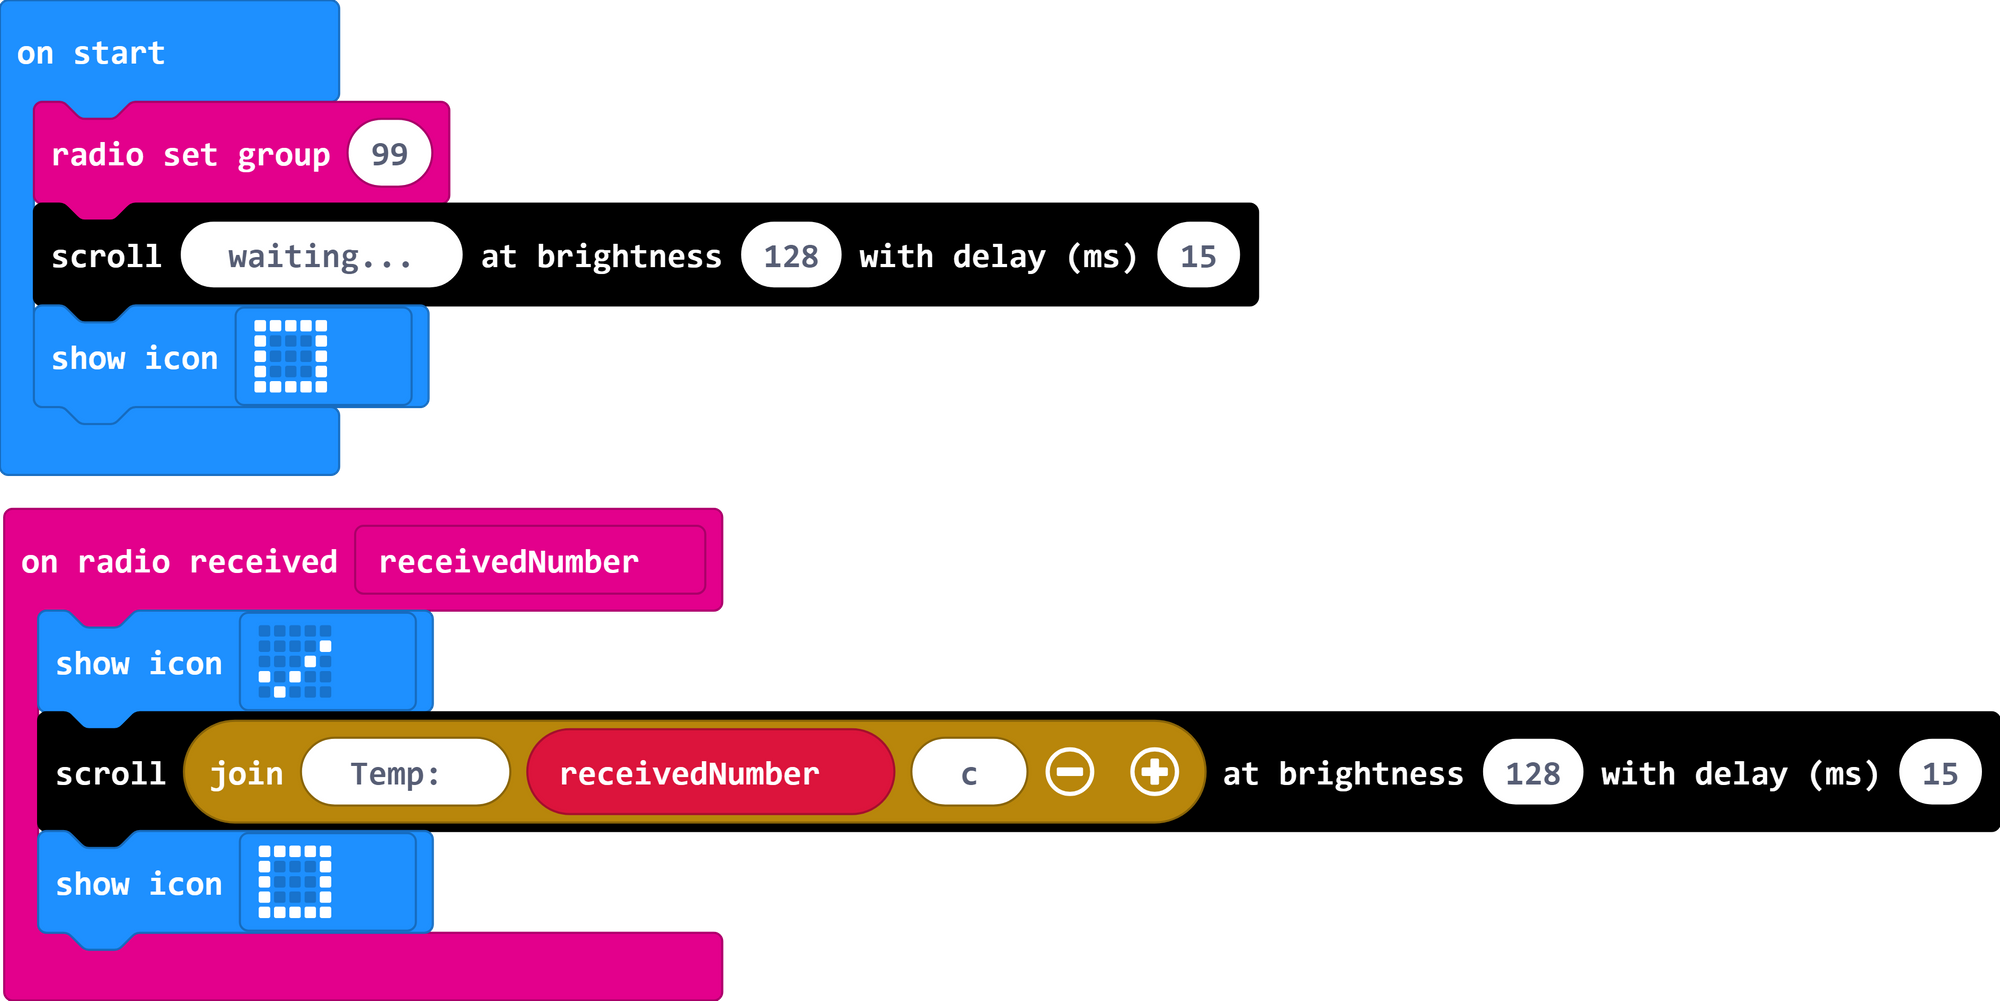
That received number is the temperature, so we need to show it on the scroll:bit. Add in a block to scroll some information.

This is where a useful block called "join" comes in. It hides in the advanced menu, under text.

We can use that block to join the text and the numbers together!

You'll see that you can add or take away items to join together - we'd like three spaces so just click on the plus button.
We've typed "Temp: " in the first gap. Note that you might have to mess around with spaces in the text parts to make it look nicer. Next, drag the "receivedNumber" block from the Variables menu into the middle space, and type "c" into the third space.

As before, this will work as it is, but adding some icons to the micro:bit screen helps you know when things are happening.
Now, house your inside micro:bit in whatever you like (or leave it on the table, up to you!).
It is a good idea to test that everything works before you go and put a micro:bit outside. Sandy stood inside with one micro:bit while I went outside with the other one, so that we could see how far away it would work.
Challenges
Try your "outside" micro:bit in different places. How far does it send the data in clear space? How do walls and windows affect it?
See if you can send more than one piece of data (hint: you will need to make some new variables).
Can you keep track of what's going on in your fridge? Is it true that the cheese switches the light on for company when you're not looking?